5. Confirm the change: Press and release the Enter button.
ENTER
The Enter LED and all input LEDs and
output LEDs return to the unlit state.
Press the Enter button to confirm
the configuration change.
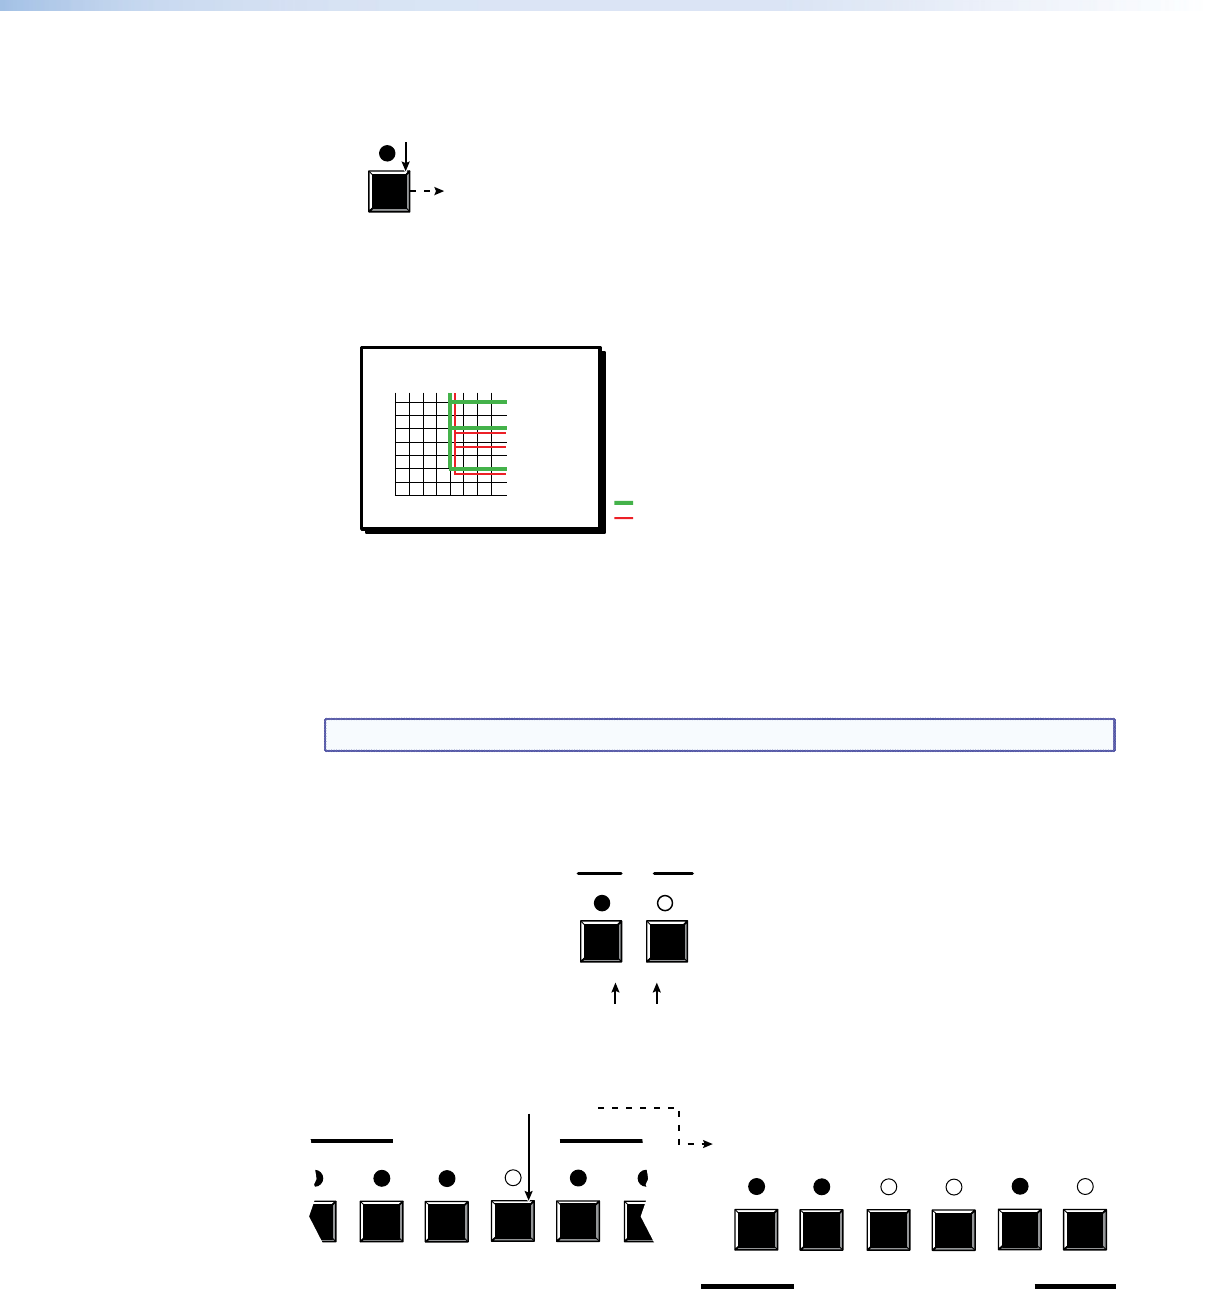
The current configuration (see figure 13) is now:
Input 5 video tied to output 1, output 3, output 4, and output 6
Input 5 audio tied to output 3, output 4, and output 6
Input
Output
1
3
4
6
5
Video
Audio
Figure 13. Example 2, final configuration
Example 3: Removing a tie from a set of computer video and audio
ties
In the following example, an existing audio tie is removed from the current configuration.
The steps show the front panel indications that result from your action.
NOTE: This example assumes that you have performed example 1 and example 2.
1. Clear all selections: Press and release the Esc button. The button ashes once.
2. Select audio only for the tie: If necessary, press and release the Video button and the
Audio button.
VIDEO AUDIO
I/O
Press the Video button to toggle on and off.
The LED is unlit when deselected.
Press the Audio button to toggle on and off.
The LED lights when selected.
3. Select an input: Press and release the input 5 button.
2 3 4 5 6 7
COMPUTER INPUTS
1 2 3 4 5 6
COMPUTER/AUDIO OUTPUTS
Press and release the Computer Input 5 button.
The LED lights.
The Computer/Audio Output 3, Output 4, and Output 6
LEDs light to indicate the audio ties created in example 1.
The output 1 LED does not light to indicate the tie created
in example 2 because that tie is computer video only.
MPX 866 A Media Presentation Matrix Switcher • Operation 27


