


45-EN
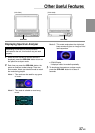
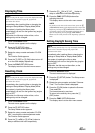
Displaying Time
NOTE
After carrying out the steps 1 to 3 of "To display the Setup
mode screen" described on page 40, perform the
operation show below.
Immediately after inputting titles or changing the
settings of Setup Mode or Display Mode (While
the system is inputting the titles or data
automatically) do not turn the ignition key (engine
key) to OFF.
Otherwise, the title may not be written, or the
settings may not be changed.
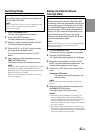
1 Press the SOURCE button.
The main menu appears on the display.
2 Press the 6 (SETUP) button.
The Setup mode screen appears.
3 Rotate the rotary encoder and select "CLOCK
DISP."
The Function Guide appears.
4 Press the 1 (OFF) or 2 (ON) button to turn off
or on the clock display respectively.
5 Press the FUNC (RETURN) button.
The display returns to the main menu screen.
Resetting Clock
NOTE
After carrying out the steps 1 to 3 of "To display the Setup
mode screen" described on page 40, perform the
operation show below.
Immediately after inputting titles or changing the
settings of Setup Mode or Display Mode (While
the system is inputting the titles or data
automatically) do not turn the ignition key (engine
key) to OFF.
Otherwise, the title may not be written, or the
settings may not be changed.
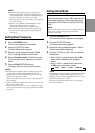
1 Press the SOURCE button.
The main menu appears on the display.
2 Press the 6 (SETUP) button.
The Setup mode screen appears.
3 Rotate the rotary encoder and select "CLOCK
ADJ." to activate the clock adjustment mode.
The Function Guide appears.
4 Press the 1 ( DN) or 2 (UP ) button to
delay or advance the hours respectively.
5 Press the 3 ( DN) or 4 (UP ) button to
delay or advance the minutes respectively.
6 Press the FUNC (RETURN) button after
adjusting the clock.
The display returns to the main menu screen.
NOTE
To quickly set the time to the nearest hour, press the 5
(TIME RESET)
button. If the displayed time is before the
half hour, pressing the 5 (TIME RESET)
button sets the
clock back to the previous hour. If the displayed time is
after the half hour, pressing the 5 (TIME RESET)
button sets the clock forward to the beginning of the next
hour.
Setting Daylight Saving Time
NOTE
After carrying out the steps 1 to 3 of "To display the Setup
mode screen" described on page 40, perform the
operation show below.
Immediately after inputting titles or changing the
settings of Setup Mode or Display Mode (While
the system is inputting the titles or data
automatically) do not turn the ignition key (engine
key) to OFF.
Otherwise, the title may not be written, or the
settings may not be changed.
1 Press the SOURCE button.
The main menu screen is displayed.
2 Press the 6 (SETUP) button. The Setup screen
is displayed.
3 Rotate the rotary encoder and select "Summer
Time." The Function Guide is displayed.
4 Press the 2 (ON) button to place the Summer
Time mode ON.
The time advances by one hour.
To return to the ordinary time, press the 1
(OFF) button.
5 Press the FUNC (RETURN) button.
The display returns to the main menu screen.