


71
55
E
N
G
L
I
S
H
CQ-VD7700U/VD7500U
70
54
E
N
G
L
I
S
H
CQ-VD7700U/VD7500U
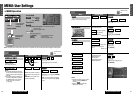
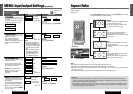
MENU: Input/output Settings (continued) Aspect Ratio
E
N
T
E
R
PWR NAVI MODE MENU
CHAPTER
ASPECT
P-MODE
TRACK
NAVIGATION
STOP
TOP MENU
DVD / SD MENU
ST/ MONO
CH1 CH2
RANDOM
RETURN
OSD
RET
RAND
AUDIO
ANGLE
REP
SUB
SPACE MUTE
VOL
GRP
DISP
123
456
7
A
8
0
9
PAGE
SCAN
PAUSE PLAY
SUBTITLE
REPEAT
SCROLL
TITLE / CHAPTER
VOL
CAR AV
A
Default: NORMAL
Mode: 4 types
Notes:
¡This adjustment is applicable to TV, VTR1, VTR2, DVD, video CD and SD-Card mode.
¡The aspect ratio is adjustable between Full and Normal when the wallpaper is on the screen.
¡When the rear view camera is in operation with the transmission gear shift in the reverse position, the image is shown on
the “FULL” screen only.
¡In some cases, the picture looks different from the original one due to your selection of aspect.
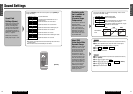
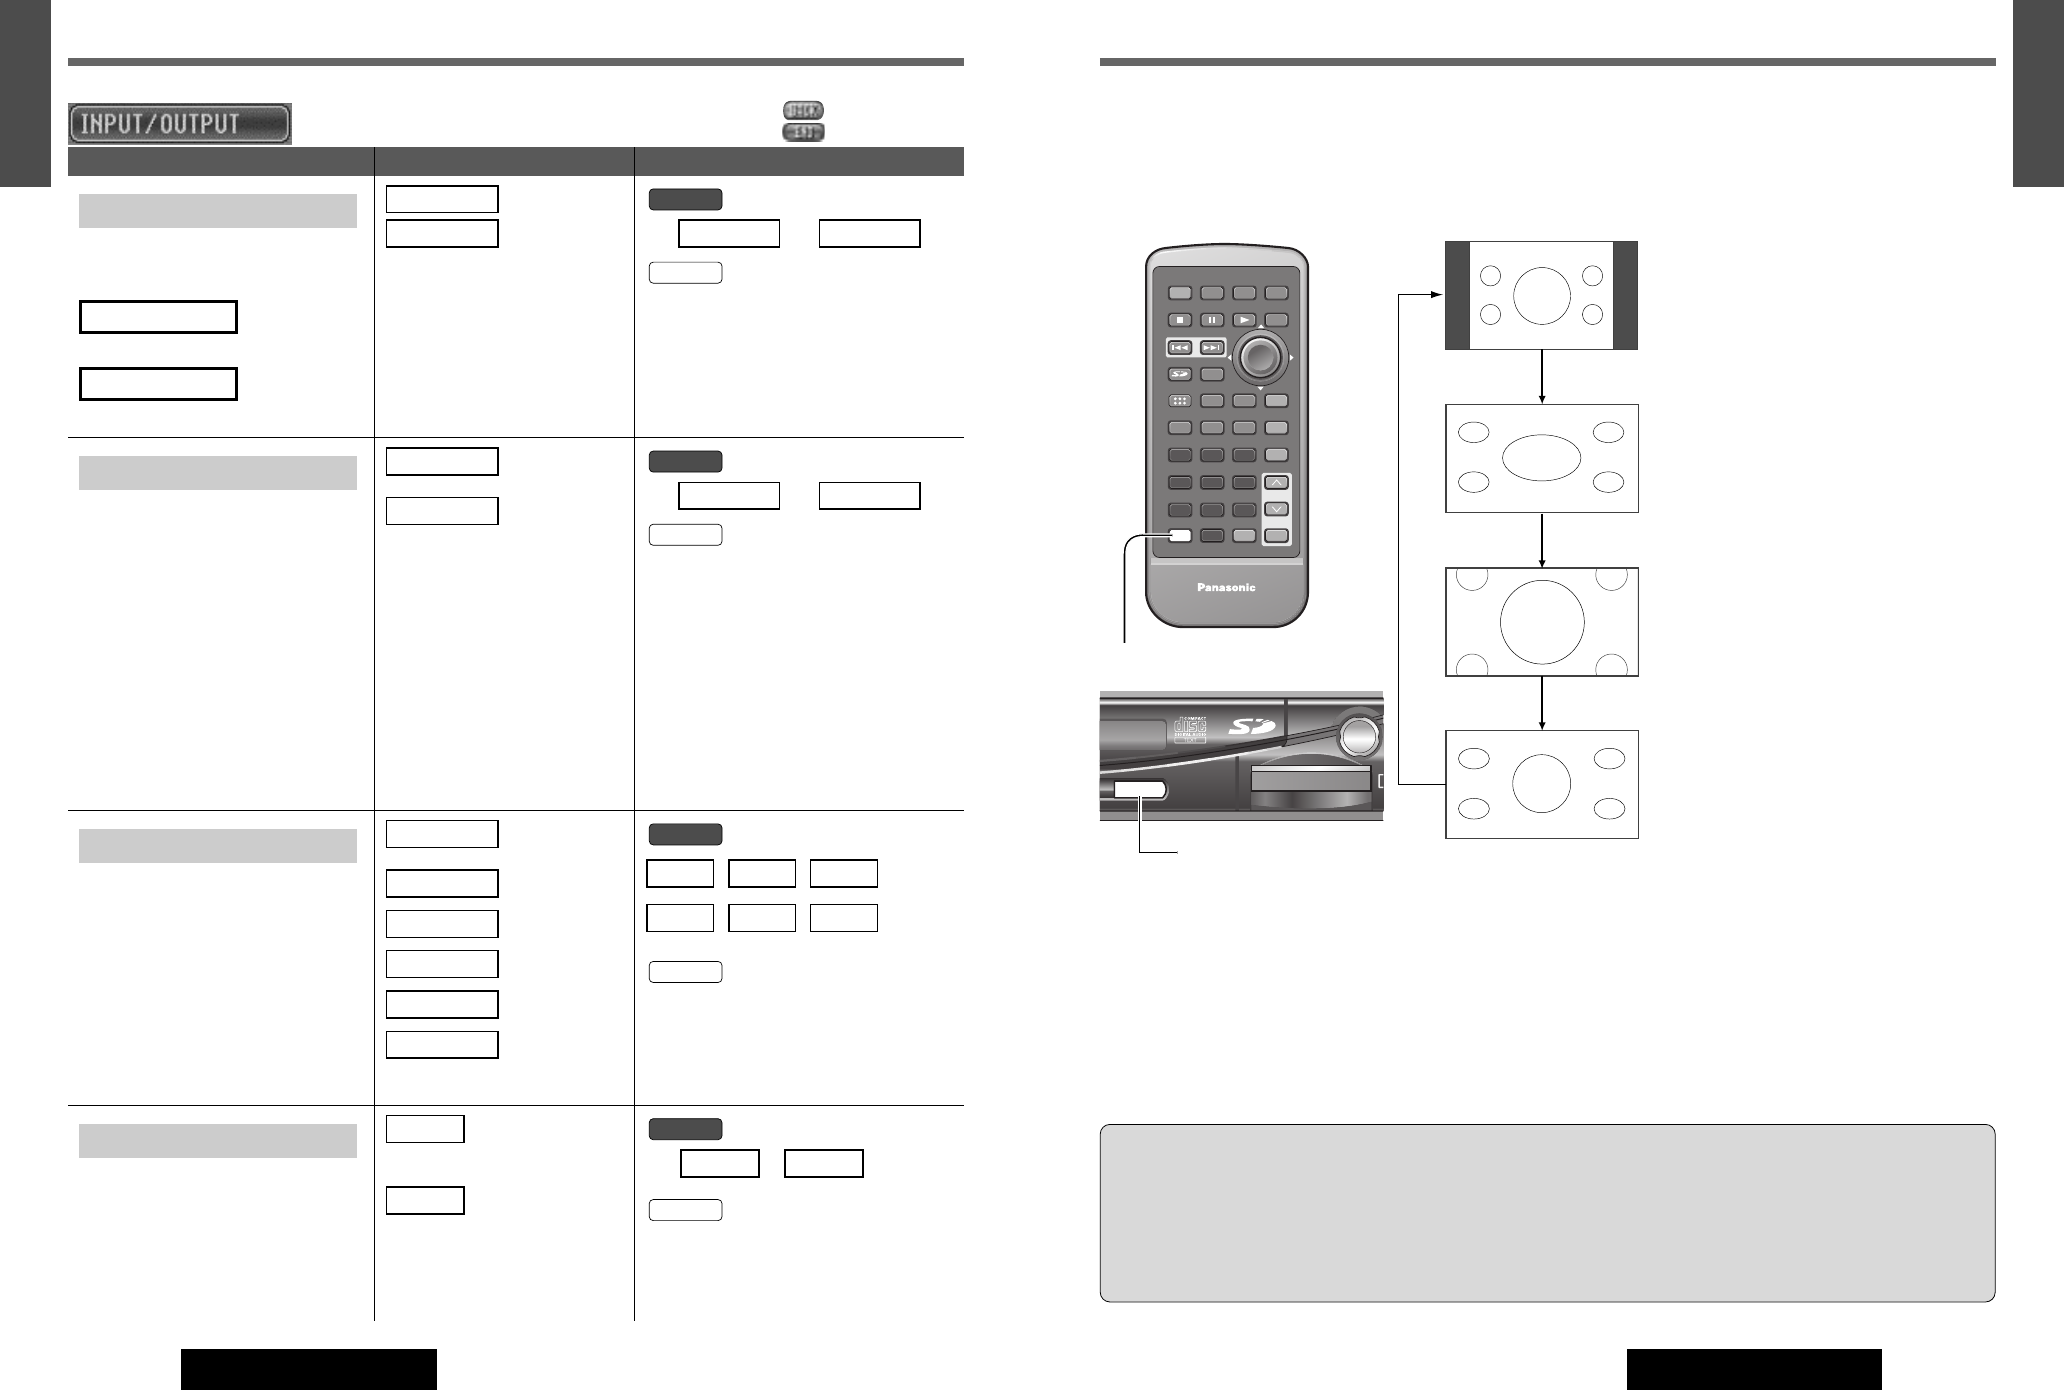
Press [ASP] (ASPECT) on the display unit or press [A] (ASPECT) on the remote
control to change the aspect ratio as follows.
NORMAL
¡The conventional display image has a 4 to 3
ratio of horizontal to vertical.
¡In this case, a blank area remains on the
right and left sides of the display.
FULL
¡The screen is extended horizontally as a
whole to the aspect ratio of 16 to 9.
¡The extension ratio is the same at any point
on the screen.
ZOOM
¡The screen is fully extended at the normal
aspect ratio of 4 to 3.
¡The top and bottom of the screen are slight-
ly cut off.
JUST
¡The screen is extended horizontally to the
aspect ratio of 16 to 9.
¡The extension ratio increases toward the
right and left ends of the screen.
Cautions:
¡This is to remind you that compression or extension of the screen using the aspect ratio (screen mode) changing
function of this product for commercial purposes of profit making or viewing/listening by the public could infringe on
the rights of the author protected by copyright law.
¡If you expand a normal picture (4 to 3) by using “JUST”, “ZOOM” or “FULL” aspect to the full size of the screen, you
might not see the periphery of the picture, or you might see a distorted picture. Therefore, use “NORMAL” mode to
see the original picture as the author intended it.
[A] (ASPECT)
[ASP] (ASPECT)
ENTER
D
SD CARD
TRACK/
CHANNEL
V / DVD / SD RECEIVER
ASPECT
P
·
MODE
ASPASP
: Previous menu
: Exit
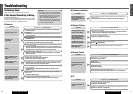
VTR SKIP
(VTR Skip)
If a VTR is not used, the VTR mode is
skipped when changing the mode.
(VTR1 skip)
(VTR2 skip)
VTR 2 SKIP
VTR 1 SKIP
: do not skip
: skip VTR1/2
default: OFF
ON
OFF
or
[}] or [{] a []] or [[]
a [ENTER]
Remote
ONOFF
Panel
VIDEO-CONT
(Video control setting)
This “Video Control Setting” is
required when you connect a
Panasonic car navigation system with
a built-in DVD player (available in
future).
:
connected to VTR1-IN
:
connected to VTR2-IN
default: VTR1
Notes:
¡Select a terminal connected to
the DVD output terminal of a
Panasonic car navigation system
with a built-in DVD player (avail-
able in future) through an RCA
cord.
¡When you connect a Panasonic
car navigation system with a
built-in DVD player, connect a
video control lead as well.
(a Installation Instructions)
VTR2
VTR1
or
[]] or [[]
a [ENTER]
Remote
VTR2VTR1
Panel
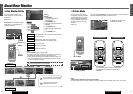
REAR MONITOR
(Rear Monitor Set Up)
You can have different picture and
sound on the front and rear monitors
at the same time (a page 74).
Preparation: Connect another
optional rear monitor. (e.g. CY-
VMX6800U) (a Installation
Instruction)
:
same as front monitor
: TV
: DVD
: SD
: VTR1
: VTR2
default: AUTO
VTR2
VTR1
SD
DVD
TV
AUTO
[]] or [[]
a [ENTER]
Remote
VTR2VTR1SD
DVDTVAUTO
Panel
BGC
(BackGround Camera)
( Always display background camera
on the display)
This function allows the background cam-
era view to be displayed at the all times.
Note: You can enter the BGC menu
also by pressing and holding
[MENU]
for 2 sec. or more.
: Background camera
view is always on
the display.
: Each mode image
is on the display.
default: OFF
OFF
ON
or
[]] or [[] a [ENTER]
Remote
ONOFF
Panel
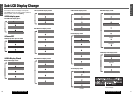
Menu Setting Value Operations