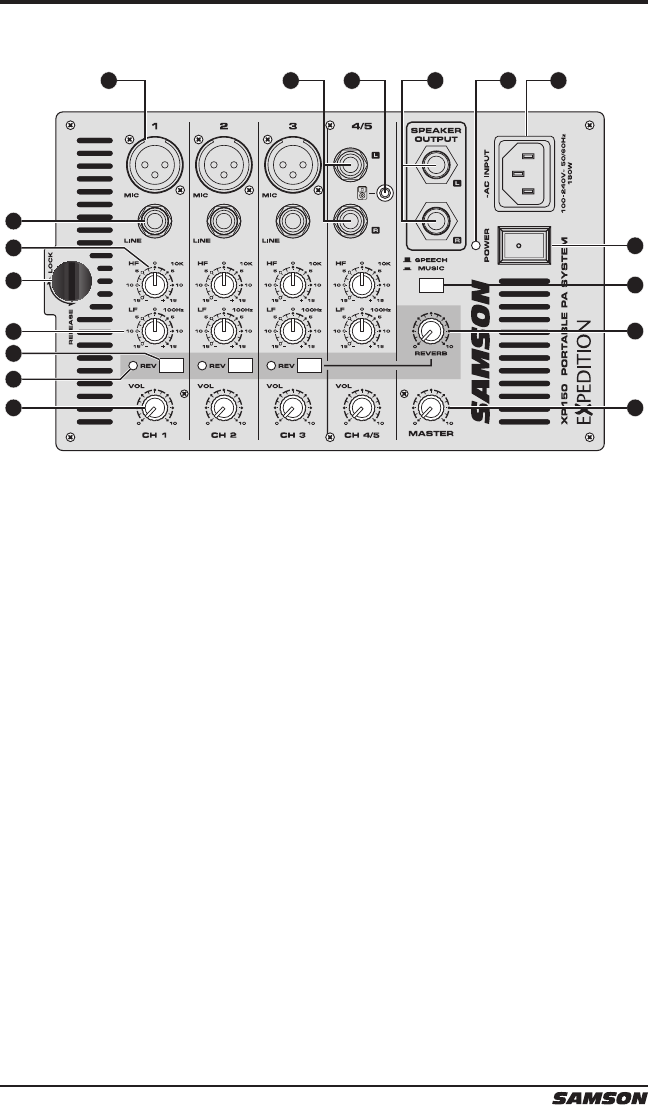
XP150 Mixer Layout
1 3 4 10 16
11
12
5
2
15
6
7
8
9
14
17
13
1. XLR Mic Input Connectors (channels 1-3) – Use these XLR jacks to connect low
impedance microphones to the XP150’s built-in mic preamps.
2. ¼-inch Line Input Connectors (channels 1-3) – Use these ¼” jacks to connect
instrument or audio sources with line level signals to the XP150. You can connect
the outputs from acoustic guitar pickups, keyboards, drum machines, CD/MP3
players and other units with line level outputs here.
3. Stereo ¼-inch Input Connectors (channels 4/5) – For stereo devices, use the
channel 4/5 L and R inputs to connect to the left and right channel outputs of the
device. Use these inputs to connect high impedance microphones, synthesizers,
drum machines, MP3, CD, tape players or any other line level device.
4. Stereo 3.5mm Input Connector (channels 4/5) – Use this input to connect a
stereo line level device, such as an an MP3, CD, or tape player.
5. High Frequency (HF) – The HF knob controls the amount of treble applied to
each channel. The channel’s HIGH frequency response is at when the knob is
in the “0” position. Rotating the knob to the right will boost the channel’s high
frequency response above 10 kHz by 15 dB, and rotating it towards the left will cut
the high frequency response by 15 dB.
6. Low Frequency (LF) – The LF knob controls the amount of bass applied to each
channel. The channel’s LOW frequency response is at when the knob is in the “0”
position. Rotating the knob to the right will boost the channel’s low frequency
response below 100 Hz by 15 dB, and rotating it towards the left will cut the low
frequency response by 15 dB.
12
Expedition XP150


