


16
HT-DV40H
HT-DV50H
Preparation for Use
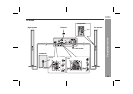
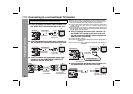
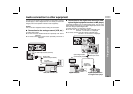
System connections (continued)
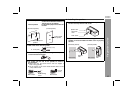
To prevent accidental short circuits between + and
-
terminals, connect the speaker wires to the speakers first, then to the unit.
CP-DV40H
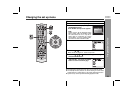
Caution:
Be very careful to prevent the speaker [2.1kg (4.6 lbs.)] from
falling when mounting on the wall.
Before mounting, check the wall strength. (Do not put on the
veneer plaster or whitewashed wall. The speakers may fall.) If
unsure, consult a qualified service technician.
Mounting screws are not supplied. Use appropriate ones.
Check all mounting screws for looseness and that they are
engaged in the speakers.
Mount the speakers on the wall using 2 screws each for horizontal
position and using 1 screw each for vertical position.
Select a good location. If not, accidents may occur or the speaker
may get damaged.
Avoid placing on a bed, sofa, water tank, sink and hallway wall.
To avoid accidents, fix the speaker wires to the wall. You may trip
over them.
SHARP is not responsible for accidents resulting from improper
installation.
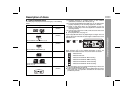
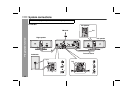
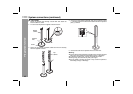
Driving screws
SHARP designed the speakers so you may hang them on the wall.
Use proper screws (not supplied). See below for size and type.
Make sure to leave the AC power lead disconnected when connecting the speakers.
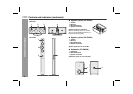
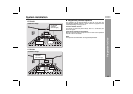
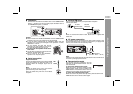
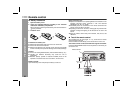
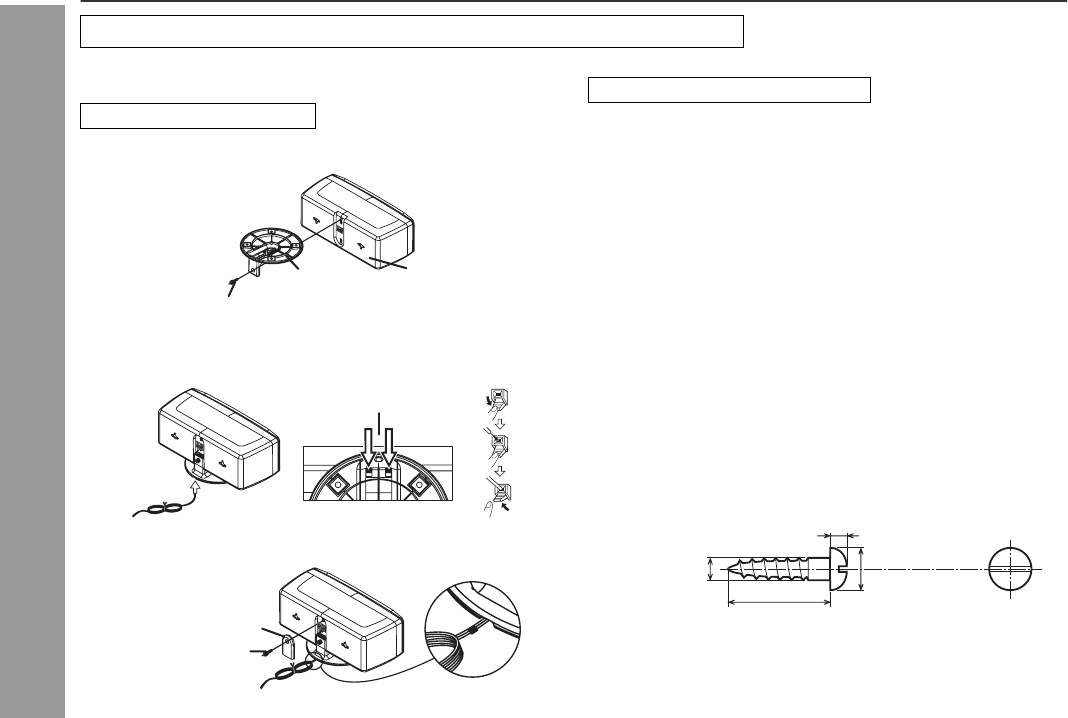
To install the speaker stand
1 Align the hole on the speaker stand to the hole on speaker.
Fix them securely with the special screw provided.
2 Route the speaker wire through the speaker stand hole. Connect
the wire without insulation tube to the speaker minus (
-
) terminal,
and the wire with red insulation tube to the speaker plus (+)
terminal.
3 Connect the other end to the main unit.
4 Attach the stand cover.
Speaker
Speaker stand
Special screw
Stand hole
Stand cover
Special screw
To mount the speakers on the wall
3.2 mm (1/8")
9 mm (3/8")
5 mm (3/16")
Min. 22 mm (7/8")