16
ENGLISH
7
After the above settings are completed, press the
ENTER button.
• The “SYSTEM SETUP MENU” screen reappears.
✽ To cancel the setting after adjusting
Display the channel level adjustment screen, then use the
, , and cursor buttons to select “LEVEL
CLEAR” and “YES”. The level settings for all the speakers
are set to 0 dB.
NOTES:
• When you adjust the channel levels while in the SYSTEM
SETUP CHANNEL LEVEL mode, the channel level
adjustments made will affect ALL surround modes.
Consider this mode a Master Channel Level adjustment
mode.
• After you have completed the SYSTEM SETUP
CHANNEL LEVEL adjustments, you can then activate the
individual surround modes and adjust channel levels that
will be remembered for each of those modes. Then,
whenever you activate a particular surround sound mode,
your preferred channel level adjustments for just that
mode will be recalled. Check the instructions for
adjusting channel levels within each surround mode on
page 22.
[4] Setting the AV1 video output
• To select whether composite video signals or S video signals
or RGB signals will be output from the AV1 SCART terminals.
• The factory default setting is “VIDEO” and DVD RGB output
is “NO (VIDEO)”.
1
2
To perform these operations from places other than the
system setting change menu, see page 14.
At the “SYSTEM SETUP MENU” screen, select “AV1
VIDEO OUTPUT” and press the ENTER button.
Remote control unit Remote control unit
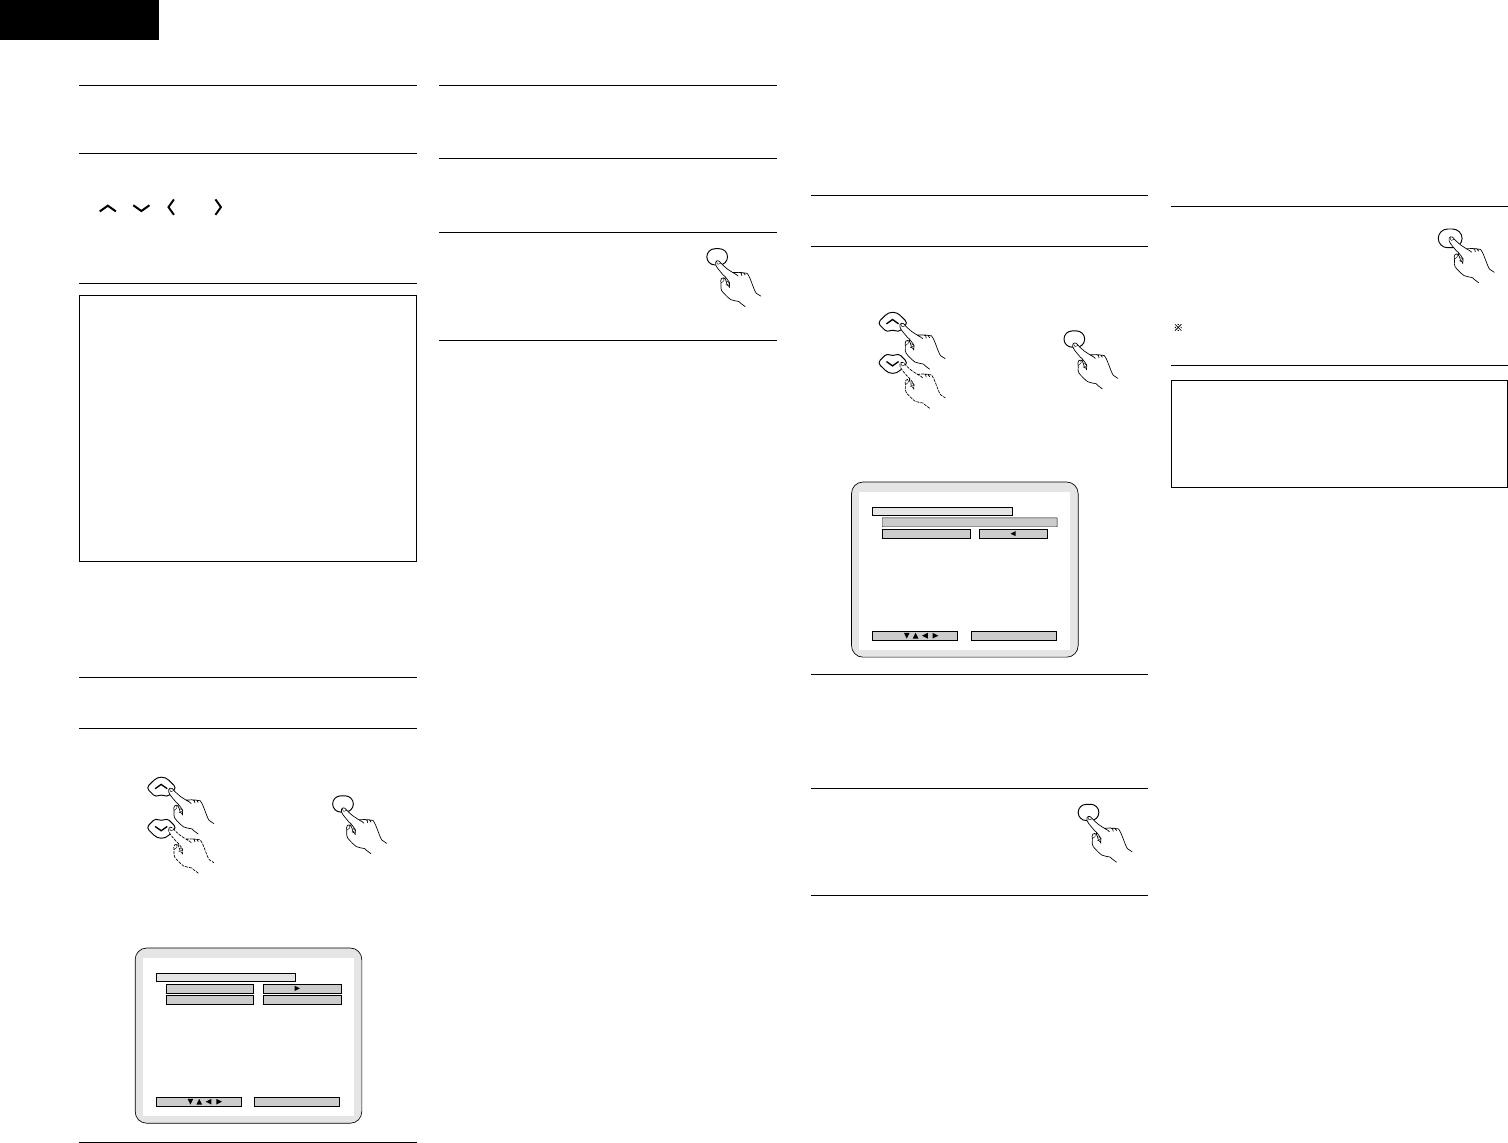
• Switch to the “AV1 VIDEO OUTPUT” screen.
B
FINISH: ENTER BUTTON
AV1 VIDEO OUTPUT
SELECT :
YES NO ( V I DEO )
VIDEO OUTPUT
DVDDVD RGB OUTPUT
V I DEO S - V I DEO
3
4
5
Select “VIDEO OUTPUT”.
• VIDEO: Composite video signals will be output.
• S-VIDEO: S video signals will be output.
Select “DVD RGB OUTPUT”.
• NO: The video signals selected at step 3 are output.
• YES: RGB signals will be output. (DVD only)
Enter the setting.
• The SYSTEM SETUP MENU
reappears.
Remote control unit
[5] Setting the DVD auto power off
• The ADV-1000 is equipped with a function that automatically
switches the power to standby if no operation is performed
for 30 minutes while in the stop mode with the function set
to DVD. Here, set whether to turn this function on or off.
• The factory default setting is “NO”.
1
2
To perform these operations from places other than the
system setting change menu, see page 14.
• At the “SYSTEM SETUP MENU”.screen, select
“DVD AUTO POWER OFF”.and press the ENTER
button.
Remote control unit Remote control unit
• Switch to the “DVD AUTO POWER OFF”.screen.
B
FINISH: ENTER BUTTON
DVD AUTO POWER OFF
SELECT :
YES NONO
(DVD FUNCTION ONLY)(DVD FUNCTION ONLY)
AUTO POWER OFFAUTO POWER OFF
3
Select “YES” or “NO”.
• YES: The auto power off function is active when the function
is set to DVD.
• NO: The auto power off function does not work.
4
Enter the setting.
• The SYSTEM SETUP MENU
reappears.
Remote control unit
[6] After completing system setup
• Once the speaker settings, delay time setting and channel
level adjustments are made, there is no need to reset them
unless the AV components or speakers are changed or the
speakers are moved to different positions.
• Change the AV1 video output and DVD auto power off
settings as necessary.
1
At the SYSTEM SETUP MENU,
press the SETUP button.
• The changed settings are
entered and the on-screen
display turns off.
Remote control unit
This button can be pressed at any time during the system
setup process to complete the process.
NOTE:
• If the quick system settings are selected after setting up
the system using the system setting change menu, the
speaker and delay time settings are changed to the
values preset for the quick system settings.
\
\


