


APPENDICES CM9760-SAT 5-7
APPENDIX IV – MODELS AND ASSOCIATED EQUIPMENT
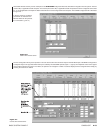
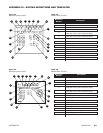
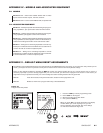
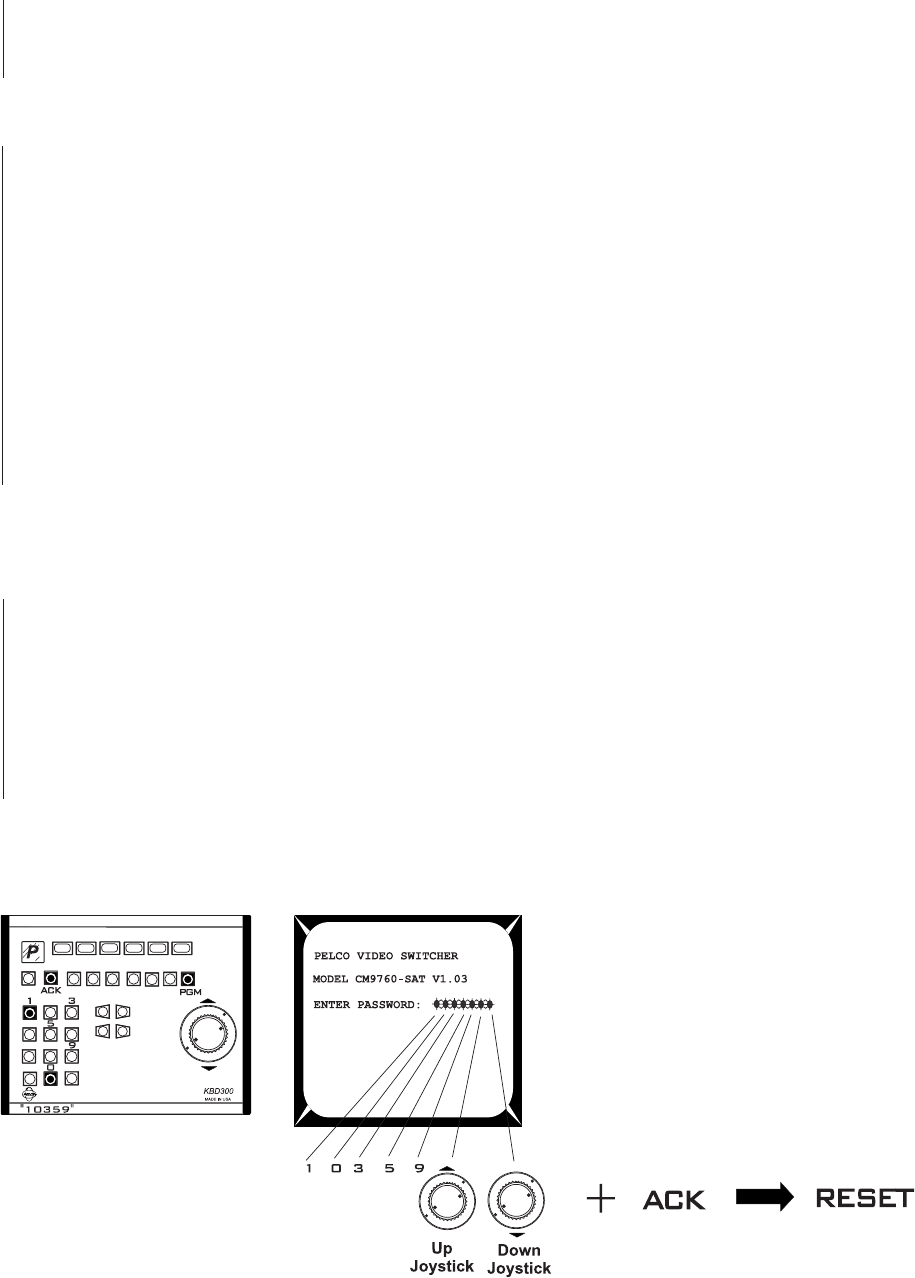
Figure 5-7
Program Code Entry Reset
IV-1 MODELS
■ CM9760-SAT – 9760 matrix satellite switcher with 16 video
inputs and four monitor outputs, 120 VAC, 50/60 Hz.
■ CM9760-SAT-X – Same as the CM9760-SAT, except 230 VAC
IV-2 ASSOCIATED EQUIPMENT
■ KBD200 – Desktop keyboard with full switching and program-
ming capabilities, plus push-button control of PTZ functions
■ KBD300 – Desktop keyboard with full switching and program-
ming capabilities, plus joystick control of PTZ functions
■ KBD300V – Desktop keyboard with full switching and program-
ming capabilities as well as joystick control of PTZ functions; in-
cludes five-inch diagonal monitor screen and interface cable
■ KBDKIT – Wiring kit for connecting keyboards to remote key-
board port; includes two RJ-45 wall blocks and a transformer to
convert 120 VAC to 12 VAC for keyboard power
■ KBDKIT-X – Wiring kit for connecting keyboards to remote
keyboard port; includes two RJ-45 wall blocks and a transformer
to convert 230 VAC to 12 VAC for keyboard power
1. Press the PGM key to enter programming mode.
2. Enter 10359 into the keypad.
3. Move the joystick Up and then Down.
4. Next, press the ACK key.
When you press ACK, you will be returned to your display
monitor. Before you can do anything more, you will
have to reinitialize your keyboard. Your menu settings
are now those illustrated in Figure 5-8.
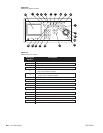
APPENDIX V – DEFAULT MENU RESET ASSIGNMENTS
The following page contains default menu reset assignments for the CM9760-SAT. If the unit “hangs” or an errant menu entry shows up for no
reason, you may be forced or may decide at some point to reset the menu entries to their factory default settings.
There are two methods available for resetting the SAT. We caution you against resetting the unit as a casual exercise. Do so only if it is
necessary, especially if you have already programmed your unit. Once reset, you will have to reprogram from scratch. For this reason, you
might want to keep a separate list of what your current settings are before resetting becomes the only option left.
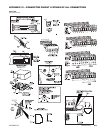
Method I Press the recessed, front-panel reset button, located on the top right of the unit.
Method II Method II, which uses a program code entry, is illustrated below: