


How to operate the Sound Adjustment Mode
69
XII
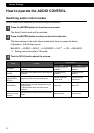
Manually adjusting the equalizer
mode
This changes to the PEQ setting
mode.
Each time the button is pressed, the
band changes in the following order.
[>]:
1 → 2 → 3 → 4 → 5 → 6 → 7 → 1 → www
[<]:
1 → 7 → 6 → 5 → 4 → 3 → 2 → 1 → www
Each time the button is pressed, the
frequency to be adjusted changes.
[]:
Increases the level.
[]:
Decreases the level.
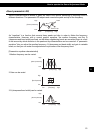
Each time the button is pressed, the Q
curve pattern changes in the following
order.
WIDE ↔ Mid WIDE ↔ NORMAL ↔
Mid NARROW ↔ NARROW ↔
WIDE ↔ www
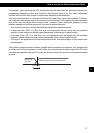
The preset value is overwritten by the
value set using the above steps.
The time alignment and crossover
adjustments will also be stored at this
time.
ATTENTION
The [5] button does not have the equalizer
correction function, and you cannot assign a
setting value to this button.
Selecting an equalizer mode
from memory
Press a preset button to select the equalizer
mode set in memory on the button. The buttons
that set equalizer modes in the memory are
called preset buttons.
Any of the following patterns can be
read from memory.
Resetting the Equalizer mode
You can reset the currently saved equalizer
adjustment value to the default.
"Are you sure to initialize all preset
EQ?" appears on the display.
1
Select "Parametric EQ" by
pressing the [ ] or [ ] button.
2
Press the [ENTER] button.
3
Select the band to be adjusted by
pressing the [<] or [>] button.
4
Press the [ENTER] button to select
the frequency to be adjusted.
5
Adjust the frequency level by
pressing the [ ] or [ ] button.
6
Adjust the Q curve pattern by
pressing the [ ] or [ ] button for 1
second or more.
7
Repeat the steps 3 to 6 to change
the settings for each channel and
band.
8
Press a button from [1] to [4] for
more than two seconds to preset a
setting value.
1
Select a button from [1] to [4] and
press it for less than one second
while the PEQ setting mode is
activated.
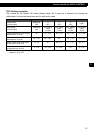
Button Pattern
[1] Pattern with enhanced treble range
[2] Pattern with enhanced bass and treble
ranges
[3] Pattern with enhanced bass range
[4] Pattern with enhanced vocal range
1
Hold down the [5] button for more
than two seconds.