SET UP
43
En
OPERATION
Additional Information
Troubleshooting
Incorrect operations are often mistaken for trouble and malfunctions. If you think that there is something wrong with
this component, check the points below. Sometimes the trouble may lie in another component. Investigate the other
components and electrical appliances being used. If the trouble cannot be rectified even after exercising the checks
listed below, ask your nearest PIONEER authorized service center or your dealer to carry out repair work.
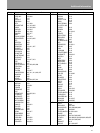
Cause
• The power plug is disconnected.
• The protection circuit may have
been activated.
• Static electricity caused by dry air.
• Improper connections.
• Sound is muted.
• The volume is turned down.
• Speakers are turned OFF.
• Improper connections.
• The input source is not properly
selected.
• Speaker settings are incorrect.
• The rear and/or center levels are
turned down.
• The surround and/or center
speakers are disconnected.
• SIGNAL SELECT is set incorrectly.
• The digital inputs are assigned
incorrectly, or not at all.
Symptom
The power does not turn ON.
The unit does not respond when the
buttons are pressed.
No sound is output when a function
is selected.
No image is output when a function
is selected.
No sound from surround or center
speakers.
Sound is produced from other
components, but not from LD or DVD
player.
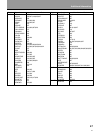
Remedy
• Connect the power plug to the wall
outlet.
• Disconnect the power plug from
the outlet, and insert again.
• Disconnect the power plug from
the wall outlet, and insert again.
• Make sure the component is
connected correctly (refer to pages
7 to 12).
• Press MUTING on the remote
control.
• Adjust MASTER VOLUME.
• Press SPEAKERSto select the
speakers you connected.
• Make sure the component is
connected correctly (refer to pages
8, 10).
• Press the correct function button.
• Refer to “SPEAKER setting mode”
on page 15 to check the speaker
settings.
• Refer to “Setting the volume level
of each channel” on page 19 to
check the speaker levels.
• Connect the speakers (refer to
page 10, 11).
• Set SIGNAL SELECT to “DIGITAL”
or “ANALOG” according to the
type of connections made. (refer to
page 27).
• Set the digital input settings
correctly (refer to page 14, 18).
• The remote control batteries have
worn out.
• Too far away or bad angle of
operation.
• There is an obstacle between the
amplifier and the remote control.
• Strong light such as fluorescent
light is shining onto the unit's
remote control signal light-
receiving window.
• A cord is connected to the
CONTROL IN terminal on this unit.
• The FL DIMMER button is pushed.
• Replace the batteries (refer to page 5).
• Operate within 7 m (23 feet), 30° of
the remote sensor on the front
panel (refer to page 6).
• Remove the obstacle or operate
from another position.
• Avoid exposing the remote sensor
on the front panel to direct light.
• Connect cord to the correct jack.
• Press FL DIMMER on the remote
control repeatedly to return to the
default.
If the unit does not operate normally due to external effects such as static electricity
Disconnect the power plug from the outlet and insert again to return to normal operating conditions.
Cannot be remote controlled.
The display is dark.


