3 Press the MULTI JOG dial (or the YES button) on the
front panel, or the ENT/YES button on the remote
control.
Sure?
is displayed.
4 Press the ENTER button (or the YES button) on the
front panel, or the ENT/YES button on the remote
control.
After the track is erased,
Complete
is shown on the
display.
NOTE
When a track is erased, the tracks are renumbered from
the next track.
Erase multiple tracks at once
(ERASE MULTI)
You can erase multiple tracks at once by specifying a
range.
Example: To erase C in track number 3 and D in 4
&SBTF
5SBDL/P
$BOE%BSF
FSBTFE
5SBDL/P
5SBDL/PTBSF
EFDSFBTFE
1 While MD playback is stopped, select
ERASE
MULTI?
from the EDIT submenu of the MD menu.
ST Trk> 001
appears.
While this is displayed, select the starting track.
2 Use the MULTI JOG dial to select the starting track.
3 Press the MULTI JOG dial (or YES key) on the unit or
the ENT/YES key on the remote control.
ED Trk> ###
appears.
While this is displayed, select the ending track.
4 Use the MULTI JOG dial to select the ending track.
5 Press the MULTI JOG dial (or YES key) on the unit or
the ENT/YES key on the remote control.
Sure?
appears.
6 Press the MULTI JOG dial (or YES key) on the unit or
the ENT/YES key on the remote control.
The tracks are erased. When the erasing is complete,
Complete
appears.
NOTE
If tracks are erased, the numbers of subsequent tracks
•
are decreased by the number of erased tracks.
This function is not available if the disc contains a
•
group. (
Can't Edit!
appears.)
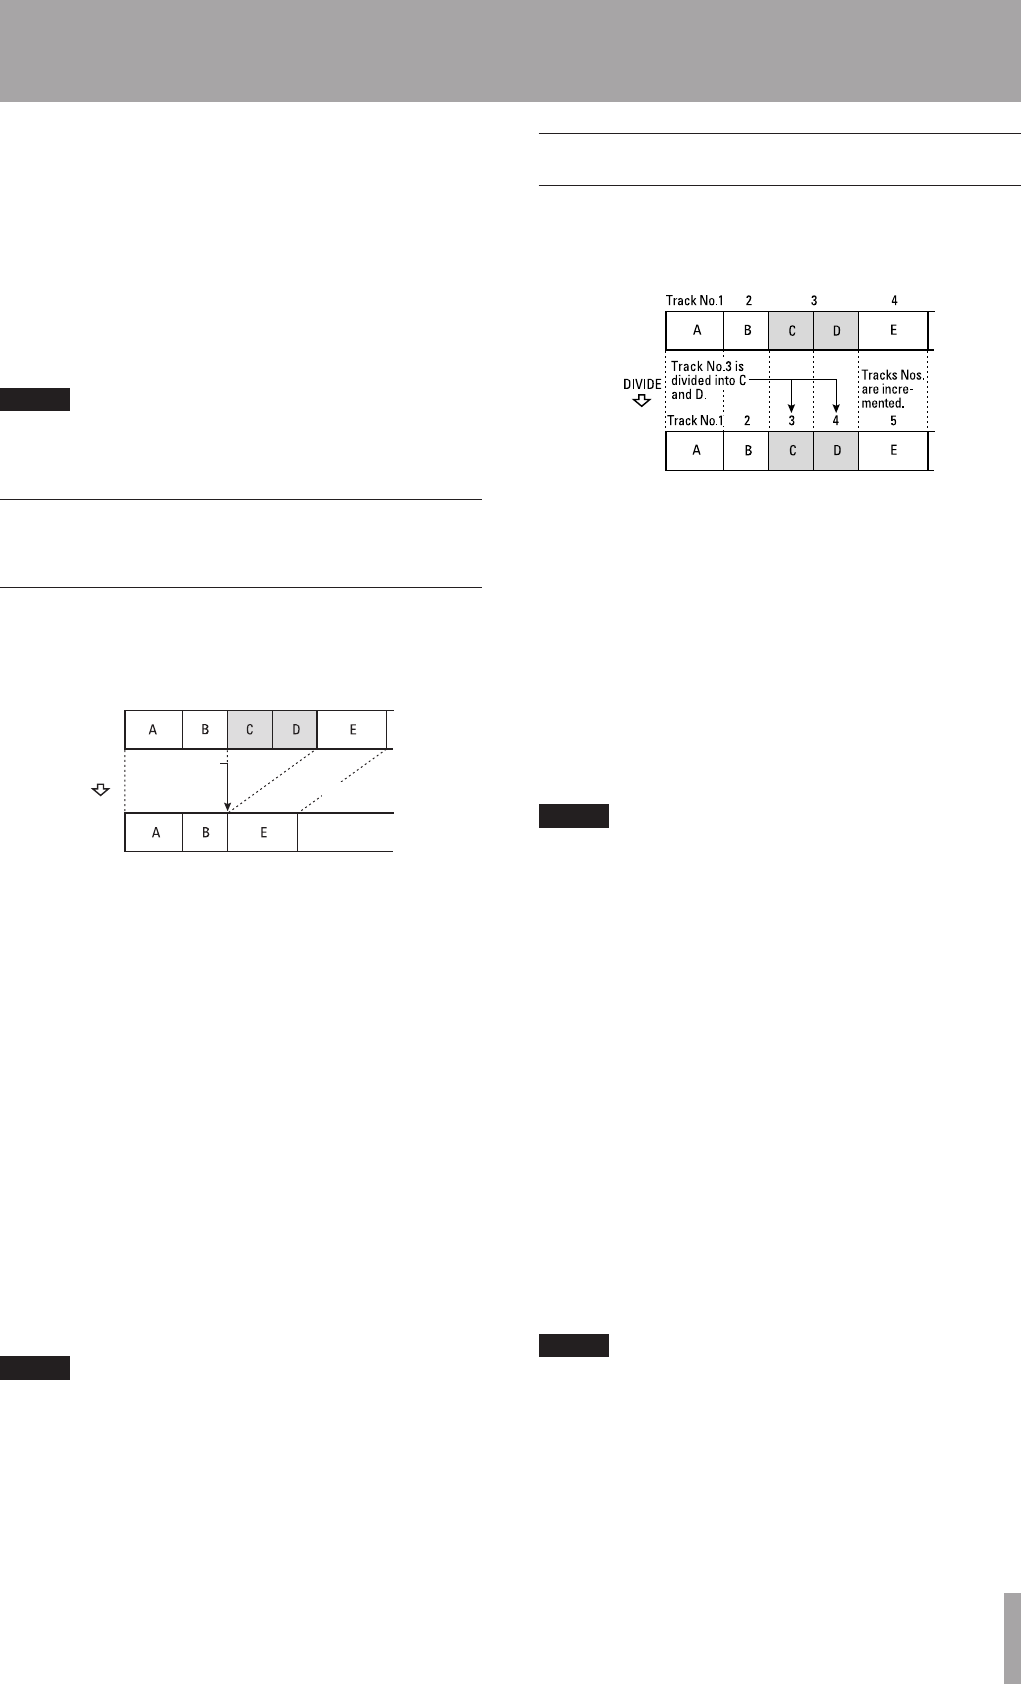
Divide tracks (DIVIDE)
Tracks can be divided into two or more tracks.
Example: To divide C and D contained in track number
3 into two tracks
1 Select the
DIVIDE?
option on the EDIT sub-menu
of the MD menu.
2 Play back the track to be divided, and at the
desired divide point, press the MULTI JOG dial (or
the YES button) on the front panel, or the ENT/YES
button on the remote control.
Point> 0
appears, and several seconds before
and after the division point (where the above
button operation was performed) are played back
repeatedly. You can check the division as short
muted spaces are placed before and after the
division point.
NOTE
As an alternate procedure to steps 1 and 2 above, play
the track to be divided, and at the desired point, put
the deck into playback standby mode. Then select the
DIVIDE?
option on the EDIT sub-menu of the MD menu,
and
Point> 0
will be displayed. Starting at the divide
point (specified in the above operation) a few seconds are
played back repeatedly to enable confirmation.
3 If necessary, use the MULTI JOG dial on the front
panel, or the MENU –/+ button on the remote
control to adjust the divide point.
4 After the divide point has been set, press the MULTI
JOG dial (or the YES button) on the front panel, or
the ENT/YES button on the remote control.
Sure?
is displayed.
5 Press the MULTI JOG dial (or the YES button) on the
front panel, or the ENT/YES button on the remote
control.
After the track is divided,
Complete
is shown on the
display.
NOTE
If a track is divided, the track numbers of subsequent
•
tracks are incremented.
If a title has been added to the track, the title of the
•
second track will be the same as that of the first one.
10 – MiniDisc editing


