6Setups
124
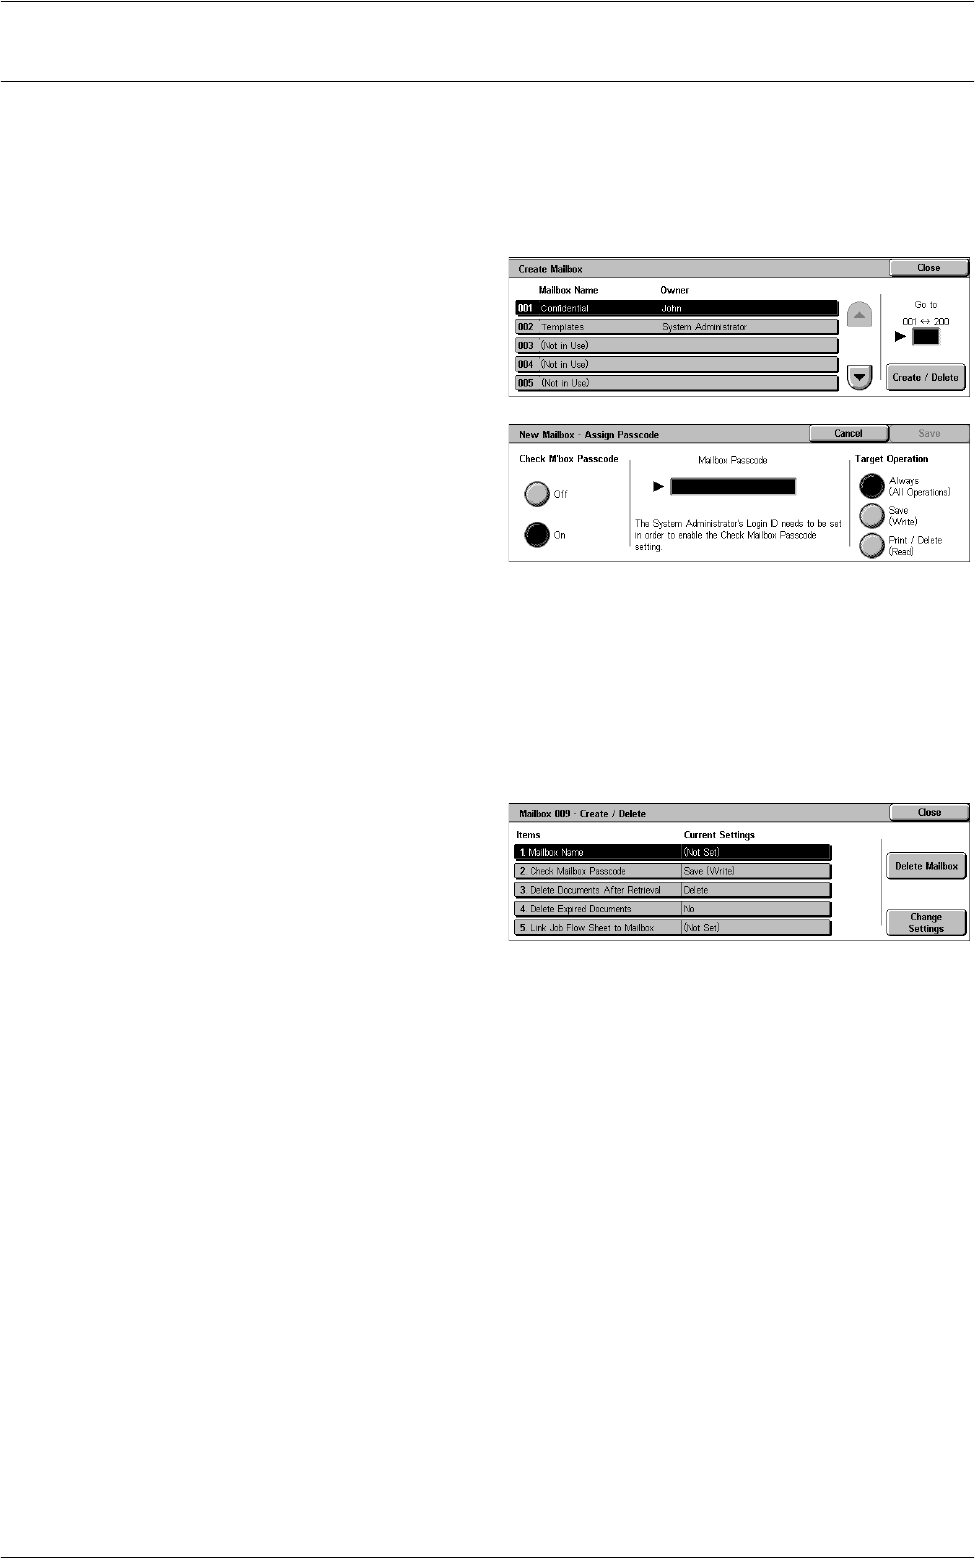
Create Mailbox
This feature allows you to create mailboxes for saving confidential incoming fax
documents, scanned documents, or print documents. Fax documents in mailboxes can
be printed out at a convenient time and scanned documents in mailboxes can be
imported to computers. Documents can also be exported from computers to a mailbox
using a print driver.
1.
Select [Create Mailbox] in the
[Group] menu.
2.
Select a mailbox number to
create a new mailbox.
3.
Select [Create/Delete].
4.
On the screen displayed, select
[On] or [Off] under [Check M’box
Passcode].
NOTE: If you select [On], go to step
5 to register a passcode. The
machine will not allow the mailbox to
be accessed unless the registered passcode is entered. If you select [Off], skip to step
8.
5.
Enter a passcode (up to 20 digits max.) using the numeric keypad on the control
panel.
6.
Select the required [Target Operation] option.
7.
Select [Save].
8.
Change the required settings.
9.
Select [Close].
NOTE: By selecting [Delete
Mailbox], you can delete all
documents in the mailbox and all job
flow sheets created through the mailbox.
Mailbox Name
Specifies the mailbox name. Enter a name (up to 20 characters) to be assigned to the
mailbox.
Check Mailbox Passcode
Checks the passcode for the target operation. Select an option for restricting access to
the mailbox through the passcode. If you select [Save (Write)], the passcode entry
screen appears when an attempt is made to edit any document in the mailbox. If you
select [Print/Delete (Read)], the passcode entry screen appears when an attempt is
made to print out or delete any document in the mailbox.
Delete Documents After Retrieval
Specifies whether to delete documents in the mailbox after they are printed out or
retrieved, or after they are transferred and printed out through a job flow sheet.
Delete Expired Documents
Specifies whether to delete documents in the mailbox after the preset time or period
elapses.


