


26
27
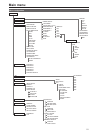
Main menu (continued)
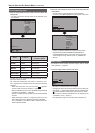
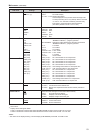
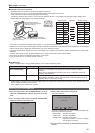
GAIN/BIAS RGB direct adjustment mode
Press the rotary knob when the “GAIN” or “BIAS” item is selected in the WHITE BALANCE VAR (1 to 3) menu, to switch to the adjust-
ing screen and use the rotary knob to directly adjust RGB while checking the picture.
If “WHITE BALANCE” is assigned to FUNCTION1 to FUNCTION5, this mode can also be accessed from the FUNCTION buttons or
the FUNCTION menu.
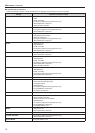
R.GAIN G.GAIN B.GAIN R.BIAS G-BIAS B-BIAS
867 818 898 100 100 100
• To adjust GAIN and BIAS, turn the rotary knob to select items (lower
row) and change numbers (upper row). Turn the rotary knob to select
items and press it to move the cursor (
) to the upper row to change
numbers.
• Turn the rotary knob to change numbers and press it to enter them
and move to the lower row.
• Pressing [MENU] in this adjusting screen returns the user to a normal
screen without a menu.
*
9
At this time, numbers that are being changed are not confirmed.
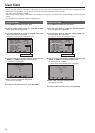
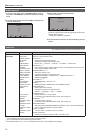
• Pressing [RETURN] in this adjusting screen (when the cursor (
) is
in the lower row) opens the following screen. The displayed screen
is one of two kinds depending on how the direct adjusting mode was
opened.
(1) WHITE BALANCE VAR 1-3
When opened from the VIDEO CONFIG screen in the main menu
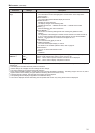
(2) “FUNCTION” menu
When opened from the “FUNCTION” menu
• Pressing [RETURN] in this adjusting screen (when the cursor (
) is
in the upper row) moves the cursor (
) to the lower row.
At this time, numbers that are being changed are not confirmed.
*
9
The WB (white balance) adjustment menu reappears after 10 seconds of inaction. However, when called using the FUNCTION but-
ton, a normal screen without a menu reappears.
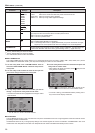
SYSTEM CONFIG
The underlined values are factory preset setting values.
Sub menu Settings Description
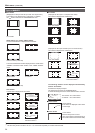
SUB WINDOW
FULL
PART
Selects sub-window type.
<FULL> Reduces the entire images for both input signals and places them side by side.
<PART> Cuts out the center of the images for both input signals and places them side by
side (the images are shown at their original size).
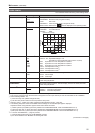
MENU POSITION
CENTER
LT
RT
RB
LB
Positions the on-screen menu.
<CENTER> Center of the screen
<LT> Left Top <RT> Right Top
<RB> Right Bottom <LB> Left Bottom
STATUS DISPLAY
OFF
3SEC OFF
CONTINUE
Sets the display state of the operating status display(→page 14).
<OFF> Not displayed.
<3SEC OFF> Displayed for 3 seconds after a status change.
*
1
<CONTINUE> Displayed at all times
INPUT NAME
SETUP
▼
Changes the name of displayed input terminals in status display screens.
*
2
SETUP LOAD FACTORY
USER1
*
3
USER2
*
3
USER3
*
3
USER4
*
3
USER5
*
3
Loads saved factory defaults (FACTORY) or user data (USER1 - USER5) (→page 20).
After loading user data, the screen displays the signal selected before user data was
loaded.
SETUP SAVE
USER1
USER2
USER3
USER4
USER5
Up to 5 sets of user data can be saved (→page 20).
Menu settings, except “SETUP SAVE/SETUP LOAD”, and adjustment values made with
the picture adjusting knob can be saved.
*
1
When PIXEL TO PIXEL, the 3SEC OFF setting becomes equivalent to CONTINUE.
*
2
Up to 9 characters can be entered for this unit. Only alphabetic characters (English), numeric characters and symbols can be used.
*
3
The settings of USER1 to USER 5 and FACTORY are the same at the time of shipment from the factory.
(Continued on next page)