


# With some rear view cameras, picture adjust-
ment may not be possible.
3 Touch c or d to adjust the selected
item.
Each time you touch c or d it increases or de-
creases the level of selected item. +24 24 is
displayed as the level is increased or de-
creased.
4 Touch ESC to hide the touch panel keys.
Adjusting the dimmer
The adjustment of DIMMER is stored sepa-
rately for each ambient light; daytime, evening
and nighttime. The brightness of LCD screen
will be adjusted to optimum level automati-
cally in accordance with the ambient light
based on the setting values.
1 Press MENU and hold to display
PICTURE ADJUST.
Press MENU until PICTURE ADJUST appears
in the display.
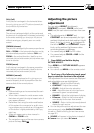
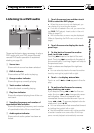
2 Touch DIMMER.
The ambient light level used as the standard
for adjusting DIMMER appears above the level
bar.
! Orange sun Adjust the brightness for
bright ambient light (daytime)
! Red sun
Adjust the brightness for in-
termediate brightness (evening)
! Yellow moon
Adjust the brightness for
dark ambient light (nighttime)
3 Touch c or d to adjust the brightness.
Each time you touch c or d it moves red to-
wards the left or the right.
The level indicates the brightness of the
screen being adjusted. The farther red moves
to the right, the brighter the screen.
4 Touch ESC to hide the touch panel keys.
Note
The icons indicating the current ambient bright-
ness used for adjusting BRIGHT and CONTRAST
may differ from DIMMER slightly.
Protecting your unit from
theft
The front panel can be detached from the
head unit to discourage theft.
! If the front panel is not detached from the
head unit within five seconds of turning off
the ignition, a warning tone will sound.
! You can turn off the warning tone. See
Switching the warning tone on page 89.
Important
! Never use force or grip the display and the
buttons too tightly when removing or attach-
ing.
! Avoid subjecting the front panel to excessive
shocks.
! Keep the front panel out of direct sunlight and
high temperatures.
! If removed, replace the front panel on the unit
before starting up your vehicle.
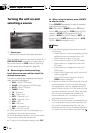
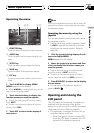
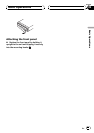
Removing the front panel
1 Press DETACH to remove the front
panel.
Press DETACH and the right side of the front
panel is removed from the head unit.
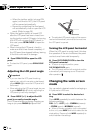
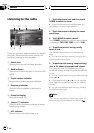
2 Gently grip the right side of the front
panel and slowly pull it outward.
Take care not to grip it too tightly or to drop
the front panel and protect it from contact
with water or other fluids to prevent perma-
nent damage.
Basic Operations
En
26
Section
04