Tuner
En
21
Listening to the radio
These are the basic steps necessary to operate
the radio. More advanced tuner operation is
explained starting on page 22.
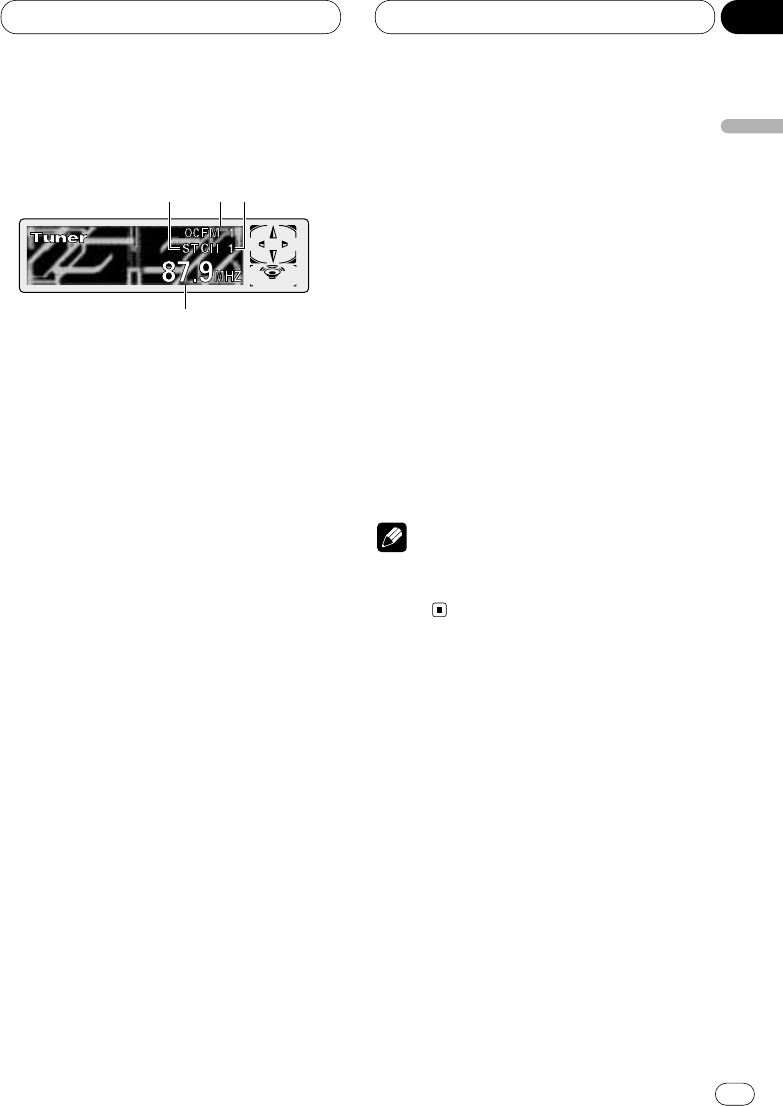
1 STEREO (ST) indicator
Shows that the frequency selected is being
broadcast in stereo.
2 BAND indicator
Shows which band the radio is tuned to, AM
or FM.
3 PRESET NUMBER indicator
Shows what preset has been selected.
4 FREQUENCY indicator
Shows to which frequency the tuner is
tuned.
1 Press SOURCE to select the tuner.
Press SOURCE until you see Tuner displayed.
• Pressing SOURCE on the head unit also per-
forms the same operation.
2 Use VOLUME to adjust the sound level.
Press VOLUME to increase or decrease the vol-
ume.
• Rotating VOLUME on the head unit also
increases or decreases the volume.
3 Press BAND/ESC to select a band.
Press BAND/ESC until the desired band is dis-
played, FM1, FM2, FM3 for FM or AM.
• Pressing BAND/ESC on the head unit also
performs the same operation.
4 To perform manual tuning, press
1 or
¡ with quick presses.
The frequencies move up or down step by step.
• Pressing 2 or 3 on the head unit also per-
forms the same operation.
5 To perform seek tuning, press and hold 1
or ¡ for about one second and release.
The tuner will scan the frequencies until a
broadcast strong enough for good reception is
found.
• You can cancel seek tuning by pressing either
1 or ¡ with a quick press.
• If you press and hold 1 or ¡ you can skip
broadcasting stations. Seek tuning starts as
soon as you release the buttons.
• Pressing 2 or 3 on the head unit also per-
forms the same operation.
Note
• When the frequency selected is being broad-
cast in stereo the STEREO (ST) indicator will
light.
123
4
English
Español
Deutsch
Français
Italiano
Nederlands
03
Section


