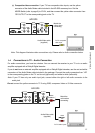
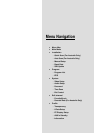
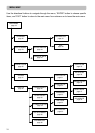
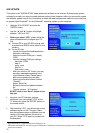
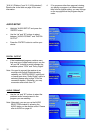
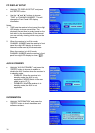
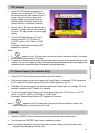
MENU NAVIGATION
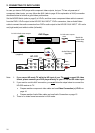
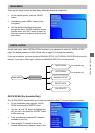
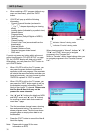
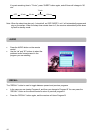
“ENTER” button to start scanning.
x If scanning is successful, “Start Scan” will change to “Get Channel Success” and signal quality will
be shown. At this point you can press “EXIT” to leave “MANUAL SETUP” or continue scanning
other channels.
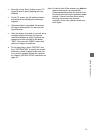
x If scanning is unsuccessful, “Start Scan” will change to “Timeout Error”. At this point you can
rescan the signal or refer to the SIGNAL LEVEL bar and signal QUALITY for aligning the
direction of the antenna to get the signal. Please refer to your antenna installer if problem
persists.
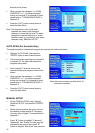
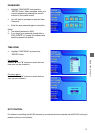
Notes:
1. For Australia, the BANDWIDTH should be 7MHz.
2. The PRIORITY should be set to “HIGH” for Australia.
3. SIGNAL LEVEL refers to the input RF signal strength as perceived by the receiver. Please
note that too strong a signal may cause erroneous readings. If you use an antenna booster
and find that you still get a low signal level, your booster gain may be set too high. In this
case, please adjust the gain accordingly.
You may also see the OSD “Bad or No Signal” or “Weak Signal” when the signal level is low.
QUALITY refers to the quality of the received digital signal. A high value of quality means that
there are few errors in the signal. In the same way, a low value of quality implies that there
are a large number of errors in the signal, which may cause distortions in video and audio.
SNR is the signal-to-noise ratio. A high SNR value means that you have a reasonably good
reception (good signal level and good quality).
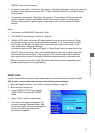
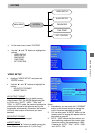
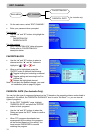
RESET DATA
Use this function when you want to clear channel data and reset the password to default (“0000”).
This function is to be used under any one of the following circumstances:
1. When the “Region Selection” menu does not appear on step 6 of page 20;
2. When moving to another city.
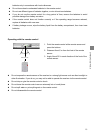
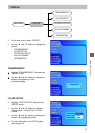
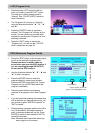
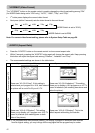
x On the “INSTALLATION” page, highlight
“RESET DATA” and press the “ENTER”
button.
x Select “YES” to restore to default data.
x The receiver will reboot automatically. You
will see a message “Database Empty” after
the boot up process. You can then proceed to
set up your receiver by following the
instructions on page 20.
27