


38 39
Navigating the Four VIDAA Smart TV Centers
Media Center
Overview of the Media Center
Supported File Formats for the Media Center
The Media Center is a central location for you to upload and view or listen to different types of content (for example,
your photos, music and movies) through the following methods:
• A personal device (for example, a USB thumb drive or USB hard drive)
• A Cloud Services application (for example, Dropbox, Skydrive or Google Drive) or by
• Streaming -- Through streaming, your devices will communicate with each other over your home network that you
use for Internet service and enable you to do things like view movies in one room and listen to music in another
room of your home.
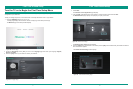
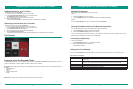
When you connect your personal devices to the TV, the Media Center automatically detects it. A Media Device
Detected window displays on the screen and prompts you to select the device to include in your Media Collection.
Depending on the device, it may take a moment for the Media Center to detect it. If a Media Device Detected
window does not appear within a few minutes, then try connecting the device to one of the other USB ports.
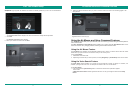
For example, if you have photos on the device, the Media Center collects and displays information such as the
Album Name (Folder Name), Folder Location, Date Created and Number of Photos.
If you have videos on the device, the Media Center collects and displays information such as the Duration, File
Size, Date Created and Number of Times Watched.
Medium File Format
Videos TS, TRP, TP, M2TS, MP4, MKV, WebM, 3gp
Photos JPG, BMP, PNG, WebP, GIF
Music MP3, FLAC, M4A/AAC, MP4, OGG
NOTE
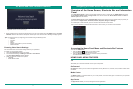
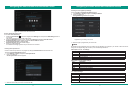
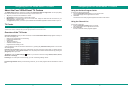
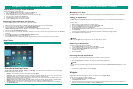
Figure 39. Media Center Home Page
Navigating the Four VIDAA Smart TV Centers
Media Pages that Make up the Media Center
• Showcase
• Photos
• Music
• Devices
Scanning Content on a Personal Device
Scanning Content in a Cloud Account
T
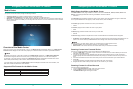
he Media Center home page contains five tabs in the menu: Showcase, Videos, Photos, Music and
Devices. The pages populate when scanning is enabled for at least one device.
The Showcase page provides a master view of all of your content. Each tile represents the type of media that
the TV system detected and can support (in other words, Photos, Video and Music).
The Videos page provides a master view of all of your video files.
The Photos page provides a master view of all of your photos.
The Music page provides a master view of all of your music files.
Devices that are in an ‘offline’ status (That is, not connected to the TV) also appear in the list.
The Devices page provides a complete view of each connected device that the Media Center recognizes.
• All Devices: Select All Devices to view a list of all of the devices that are currently being recognized by the TV
system. You can also browse your Devices folder and manage which devices are included in scanning.
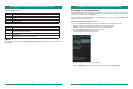
To scan your content and include it in the group collection of the Media Center:
1. Connect a USB cable to your device. If your content is on a thumb drive, then insert it directly into one of the
USB ports on the side of the TV.
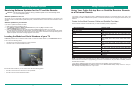
2. Connect the opposite end of the USB cable from the device to the USB port on the TV. After a moment, a
window displays that reads ‘Media Device Detected’ and prompts you to select the device that you want it to
scan.
3. Check the box beside the name of the device that you want to scan and include in your media collection.
4. Select OK.
A ‘Scanning Elements’ message appears at the bottom left corner of the screen.
5. Navigate the menu tabs at the top of the screen to view or listen to your content.
To scan content in a Cloud account:
1. From the Connected Devices page, select your Cloud account.
2. Press the [Blue] button at the bottom of the remote.
The Media Center begins scanning the content.
• Favorite Folders: View content that is located in your Favorite Folders.
• Recent Folder: View content from the most recent folders that you have launched media.
NOTE