


15
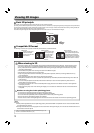
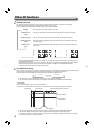
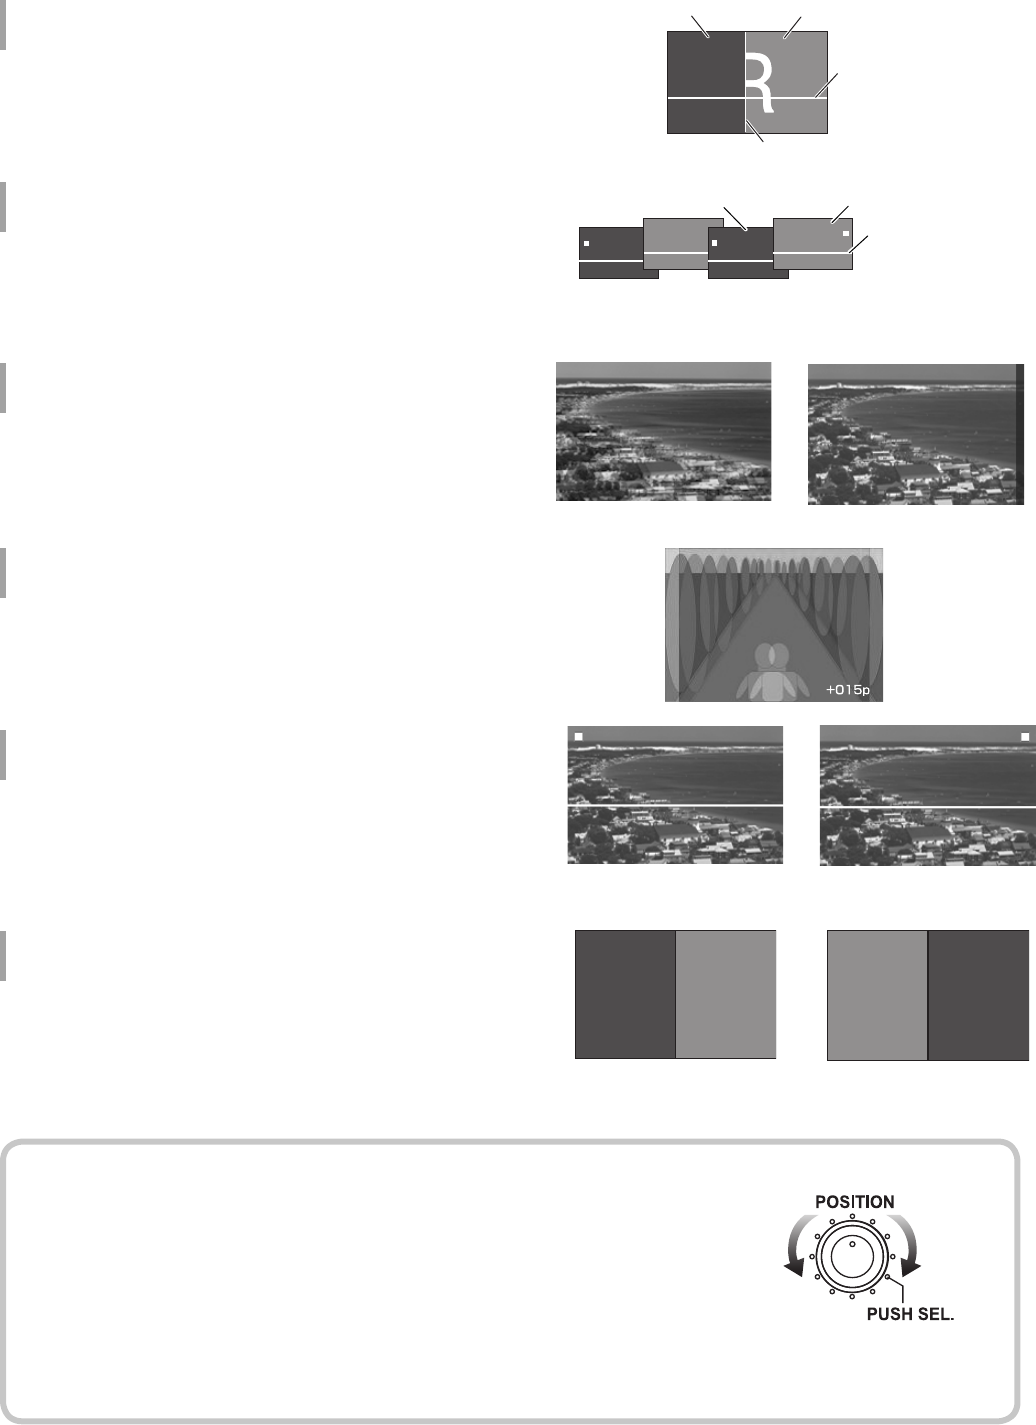
SPLIT
L image is displayed on the left of the SPLIT line, and R image on
the right. You can check the difference between the images from
the two cameras.
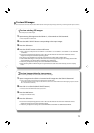
LR SEQ.
Images for the left and right eyes are displayed alternately at
0.5-second interval.
● A marker appears on the upper part of the screen, which
distinguishes between L and R images.
L image: Upper left
R image: Upper right
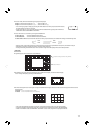
R SHIFT
L and R images are overlapped. You can move the R image
horizontally and check the difference between the images.
● While “R SHIFT” is active, the images are corrected according to
the check using the circular polarizing glasses.
ANAGLYPH
L and R images colored red and blue separately are overlapped.
You can move the R image horizontally and check the difference
between the images.
INDIVIDUAL
Either L image or R image is displayed.
● Each time you press SELECT button, the picture changes in the
following order.
● A marker appears on the upper part of the screen, which
distinguishes between L and R images.
L image: Upper left
R image: Upper right
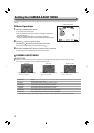
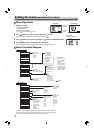
LR SWAP
L and R images are exchanged and then displayed. You can
exchange the images without repluging the terminals.
●
The setting is retained even when the menu closes. Note that L
and R images have been exchanged when the setting is set to
“ON.”
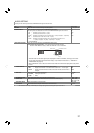
L image R image
SDI IN SDI IN
1/L 2/R
SDI IN SDI IN
1/L2/R
LR SWAP “OFF” LR SWAP “ON”
L and R images not correspondent L and R images correspondent
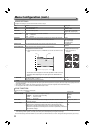
H line
L
R
L
R
0.5 sec. 0.5 sec. 0.5 sec. 0.5 sec.
L image
R image
L image R image
H line
SPLIT line
L
POSITION knob/PUSH SEL. button
You can move the displayed SPLIT line/H line/R image (only in “R SHIFT” or “ANAGLYPH”) by turning
the POSITION knob.
To move right/up: Turn the POSITION knob clockwise.
To move left/down: Turn the POSITION knob counterclockwise.
To select a line to move: Press the PUSH SEL. button.
● Pressing and holding the PUSH SEL. button for 3 seconds or longer resets the lines and R image to the default positions.
● The intensities of the SPLIT and H lines can be changed in “L. INTENSITY” under the MAIN MENU “3D SETTING.” (→page 19)