


7
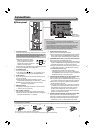
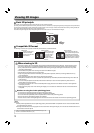
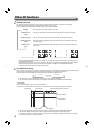
Connections
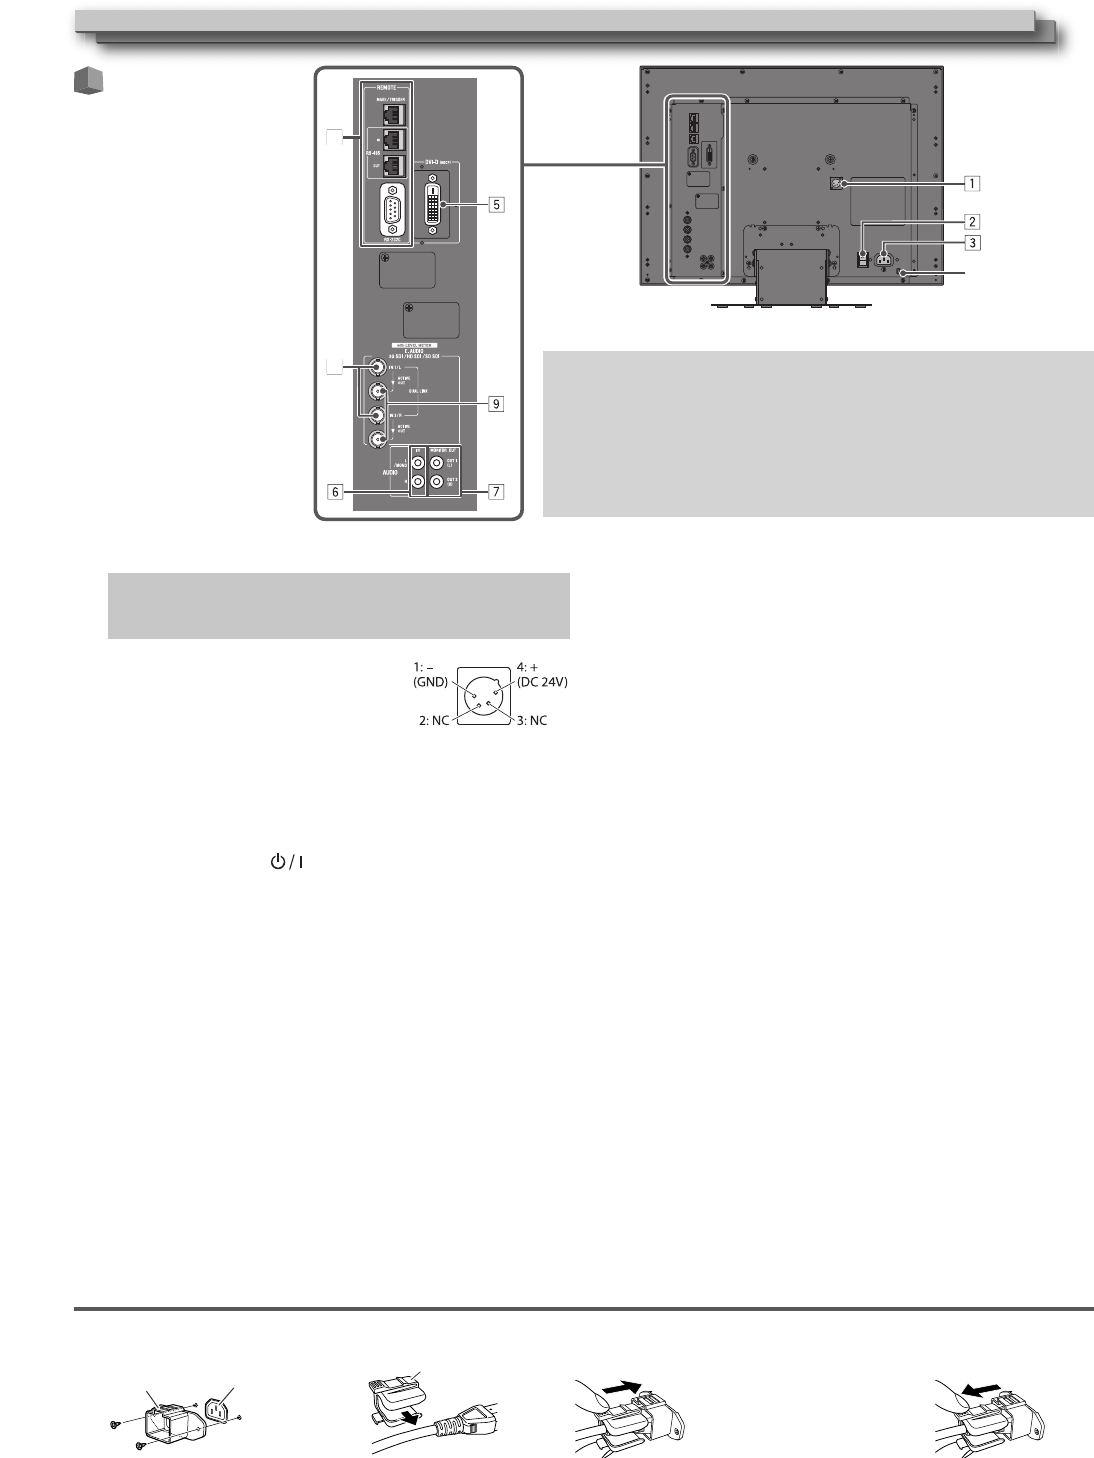
1 DC IN 24V terminal
Terminal for DC 24V power supply (Voltage range: DC 23.3V − DC 25.5V).
When using the DC 24V power supply (Voltage range: DC 23.3V − DC
25.5V), check the pin number, signal, and polarity of the DC IN 24V
terminal. A wrong connection may cause fire or injuries.
●
When both AC power and DC 24V
power are connected, the AC power
has priority. When the AC power is
switched off, the power automatically
switches to the DC 24V power.
●
Use the DC power equipped with LPS (Limited Power Sources).
● Use the DC 24V power that supplies 4.8 A.
2 AC POWER switch
Turns AC power on or off.
● You need to press button (→ a on page 9) to use
the monitor after turning on the AC POWER switch.
3 AC IN terminal
AC power input connector. Connect the provided AC power
cord to an AC outlet.
●
Attach the provided power cord holder to prevent
accidental disconnection of the AC power cord. (
→
below)
Caution: Do not connect the power cord until all other
connections are completed.
4 REMOTE terminal
Terminal for controlling the monitor by an external control
(→ “External Control” on page 26).
5 DVI-D (HDCP) terminals
Input terminal for the DVI-D signal compatible with HDCP.
● When the picture is not displayed correctly, change the
setting of “DVI INPUT SEL.” (→ page 25)
6 AUDIO (IN) terminals (pin jack)
Input terminals for the analog audio signals.
●
Use this terminal for the analog audio connection of the SDI.
When a superimposed signal (EMBEDDED AUDIO signal on
an SDI signal) is input, analog audio signals cannot be input.
7
AUDIO MONITOR OUT (OUT 1(L), OUT 2(R)) terminals (pin jack)
Output terminals for the analog audio signal.
●
The terminals emit the audio signals through the AUDIO (IN)
terminal or EMBEDDED AUDIO signals through the E. AUDIO
3G SDI/HD SDI/SD SDI (IN 1/L or IN 2/R) input terminal.
●
The signal is output from this terminal only when the monitor is on or
in “P.SAVE” (power save) mode (
→
“NO SYNC ACTION” on page 22).
● The EMBEDDED AUDIO signal...
is decoded into an analog signal, then emitted. –
is emitted only when “SDI 1/L” or “SDI 2/R” is selected, and
–
when EMBEDDED AUDIO signals come in to the E. AUDIO 3G
SDI/HD SDI/SD SDI (IN 1/L or IN 2/R) terminal.
8
E. AUDIO 3G SDI/HD SDI/SD SDI (IN 1/L, IN 2/R) terminals (BNC)
Input terminals for the 3G SDI/HD SDI/SD SDI signals.
●
The terminals accept also EMBEDDED AUDIO signals including
up to 12 audio channels with a sampling frequency of 48 kHz.
● Use SDI IN 1/L and SDI IN 2/R terminal when selecting
DUAL LINK SDI for the input.
●
In the stereo camera rig shooting, the L image is input into the SDI IN
1/L terminal, and the R image into the SDI IN 2/R terminal. In the case
of 3G SDI LEVEL B, the image is input into the SDI IN 1/L terminal.
For 3G SDI LEVEL B Dual Stream, input into the SDI IN 1/L
terminal. For 3G SDI LEVEL B DUAL LINK mapping, input into
the SDI IN 1/L and SDI IN 2/R terminals.
9
E.AUDIO 3G SDI/HD SDI/SD SDI (ACTIVE OUT) terminal (BNC)
Output terminal for the 3G SDI/HD SDI/SD SDI signals.
●
The SDI IN 1/L and SDI IN 2/R input signals are reclocked and output.
● The signals are emitted from this terminal only when
the monitor is on or in “P.SAVE” (power save) mode.
Security slot
Attach a security
wire to this slot.
Note for connections
• Before making any connections, turn off all the equipment.
• Use a cord whose plugs correctly match the terminals on this monitor
and the equipment.
• Plugs should be firmly inserted; poor connections could cause noise.
• When unplugging a cord, be sure to grasp its plug and pull it out.
• DO NOT connect the power cord until all connections are complete.
• Refer also to the user manual of each piece of equipment.
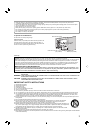
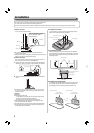
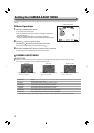
Attaching the power cord holder
The provided power cord holder prevents accidental disconnection of the AC power cord from the AC IN terminal. The holder consists of two parts: the cord case and the case cover.
● Do not use any screws other than those supplied.
● Push the case cover into the cord case and check that the power plug is connected firmly.
2
case cover
3
To take off the case cover
cord case
AC IN terminal
1
8
4
Rear panel