


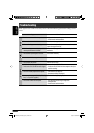
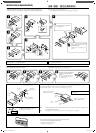
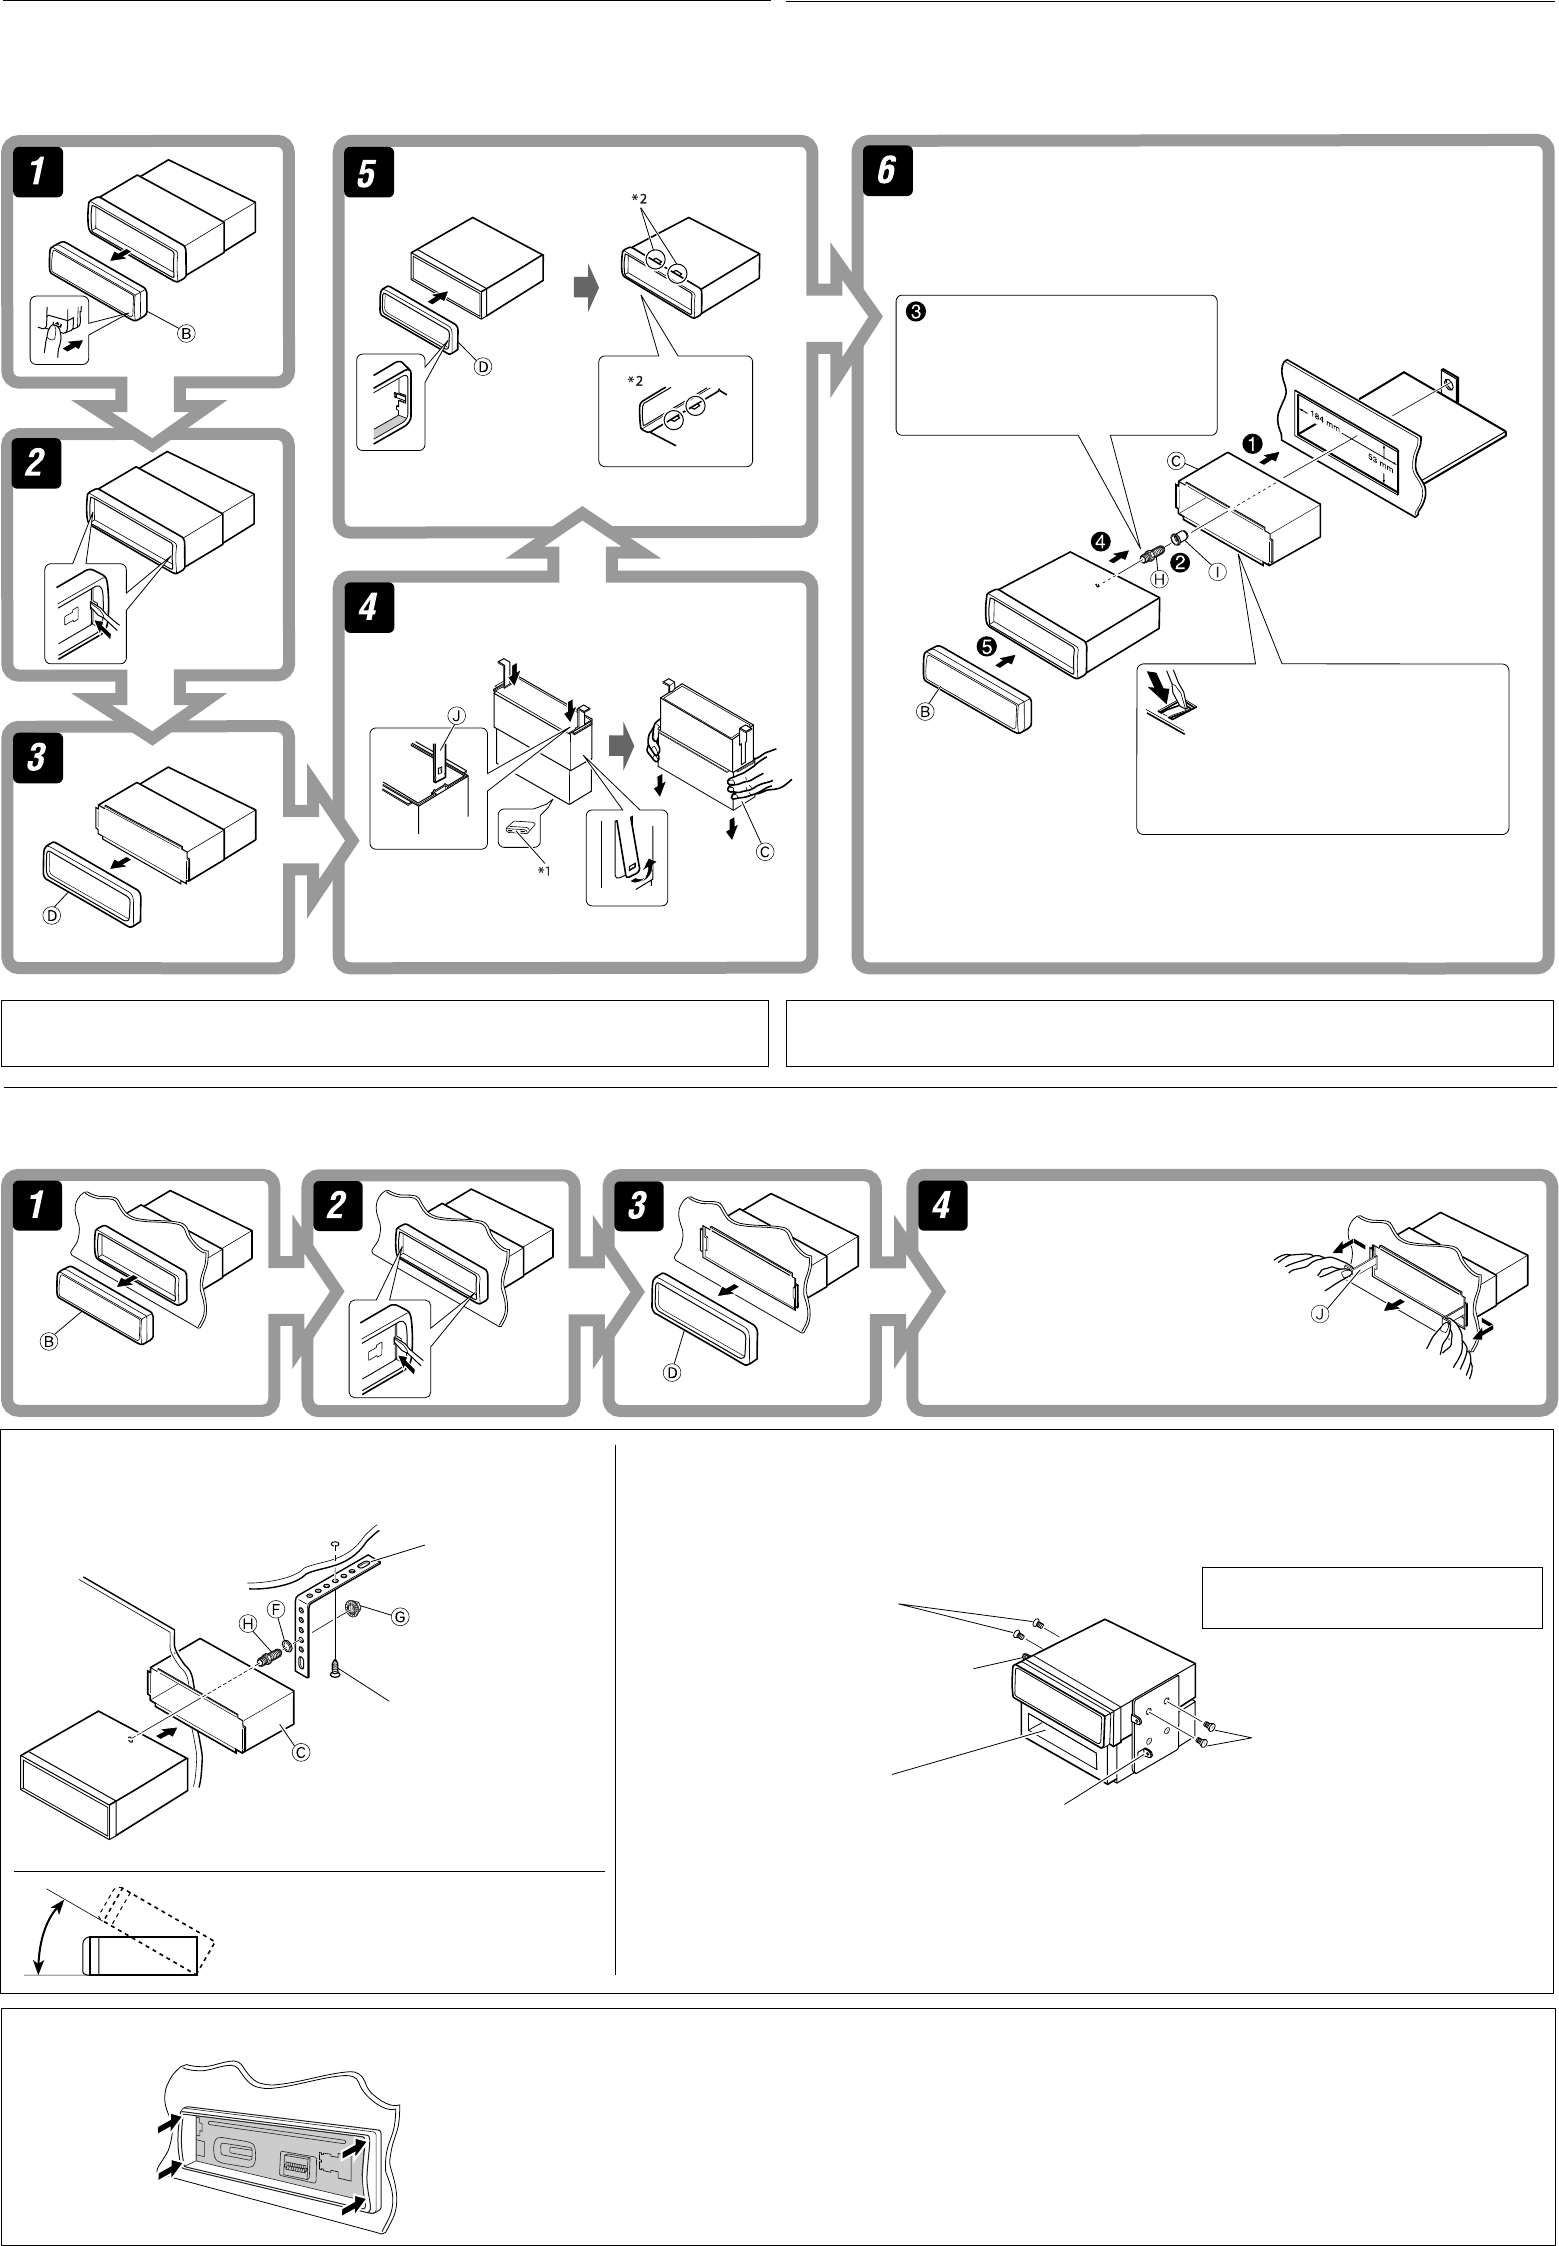
INSTALLATION (IN-DASH MOUNTING)
The following illustration shows a typical installation. If you have any questions or require information
regarding installation kits, consult your JVC car audio dealer or a company supplying kits.
• If you are not sure how to install this unit correctly, have it installed by a qualified technician.
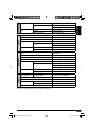
Removing the unit
Before removing the unit, release the rear section.
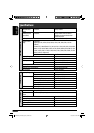
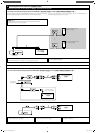
When installing the unit without using the sleeve / ࠝˀՠΈ͚ࢮጆೌϰ༬͵ጆ
In a Toyota car for example, first remove the car radio and install the unit in its place.
̣ᕙΉ(TOYOTA) ԆԾբ ࡛ζ֊̳ԆԾЂࡖጅç݈અʹጅ༫ʈմڏ̳ڄтé
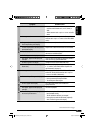
When using the optional stay / ࠝΈ́ᆊނ
Note : When installing the unit on the mounting bracket, make sure to use the 8 mm-long screws. If longer screws are
used, they could damage the unit.
ٍิ : ӕʹጅϯ༫ϚЁࣙʕइçੀͫ՟·8 mmۂڄᒘീਐéϨ՟·ཫۂڄᒘീਐç๑ᖢʹጅé
*
3
Not supplied for this unit.
*
3
ʿᎲʹጅಏաé
Screw (option)
ᒘീਐ·ڄ
Stay (option)
̀ᆉށ·ڄ
Fire wall
Վ̑ػ
Dashboard
ᄭڷػ
Install the unit at an angle of less than 30˚.
અʹጅϯ༫Ϛ˲ؠ30˚ڄԴܾé
2
Bracket*
3
Ёࣙ*
3
Pocket
ڏೋ
Flat type screws (M5
× 8 mm)*
3
ͦᏃᒘീਐ (M5 × 8 mm)*
3
Bracket*
3
Ёࣙ*
3
Flat type screws (M5 × 8 mm)*
3
ͦᏃᒘീਐ (M5 × 8 mm)*
3
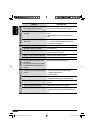
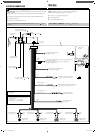
Do the required electrical connections.
නмᄔڄྐཔé
*
1
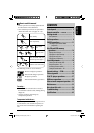
When you stand the unit, be careful not to damage the fuse on the rear.
*
1
৹ʹጅइçʮ˻ʿ࠱๑ᖢנ௰ڄۘᎳീé
Bend the appropriate tabs to hold the
sleeve firmly in place.
Ҿᛮጅೋڄߴдçӕ͙ࢭጅೋԕ֣Ϛᄭ
ڷػ˖é
*
2
Fit the protrusions outside the unit.
*
2
અߴ̳௰˜ϯϚʹጅ͙௰é
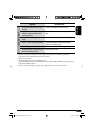
Insert the two handles, then pull them
as illustrated so that the unit can be
removed.
ݝ࿌Εçઅղ̕ػܓӕ˾ʈ̿
ᆥç݈ძᗌϙનղώ͙ղ̕ӕ
˾çʹጅᎲ˃̳é
Fit the unit into the mounting sleeve by using four corners of the trim plate.
• DO NOT press the panel (shaded in the illustration).
અʹጅ·͗ࡴԴڄ༫ྟख֣׆ռϯ༫ࢭ˖é
• ʿ࠱ᐅᏫࡒػă࿌ˀڄఀᅬ௰˜Ąé
Caution when installing / ϰ༬ٍิො
ϰ༬༬éׇ֤ϛᄮڸؼ˗
ʓࡒڄ࿌༱ڷΕʄյܓڄϯ༫ദҺéϨسЉᖅçᄔ࠱Љᘕࢭ˔άڄཊऄçቁώJVC
ԆԾࡖᛏ˜ኀੋࢭ˔άաᏻ˙͌༿é
ëϨسʿᇧ׆Ϩщᇧϙϯ༫ʹጅçᏻቁϐतڄӑிʆ࢜գϯ༫é
։͵ጆ
Ϛ؛ֈʹጅۮçᏻઅʹጅ݈௰ڄ֣׆֜௰˜ᖑළé
E-C Instal1-3_SH100#16CE4C.indd 2E-C Instal1-3_SH100#16CE4C.indd 2 14/2/06 2:50:20 PM14/2/06 2:50:20 PM