


# When playing discs recorded with more than
96 kHz sampling frequency, you cannot use audio
functions. Also, equalizer curve setting, POSI,
AUTO EQ and AUTO TA will be canceled.
# When playing discs recorded with more than
96 kHz sampling frequency, audio is outputted
from front speakers only.
# When both the center speaker and the rear
speaker are set to OFF in the speaker setting, you
cannot switch to PLII.
# All audio functions arelocked out when the di-
rect control is on except VOLUME and PLII.
# When you select MUSIC in the PLII, you can
select adjusting music mode.
# When playing other than the DVD disc, you
cannot switch to DRC.
# When selecting FM as the source, you cannot
switch to SLA.
# When you select TA:OFFin INITIAL, you can-
not select FL.
# You cannot select AUTO EQ if auto TA and EQ
has not been carried out. SETA-EQ is displayed.
# To return to thedisplay of each source, press
BAND/ESC.
# If you do not operate the DSP function except
for TEST TONE, FL and PEQ within about 30 sec-
onds, the display is automatically returned to the
source display.
Using balance adjustment
You can change the fader/balance setting so
that it can provide the ideal listening environ-
ment in all occupied seats.
1 Use MULTI-CONTROL to select FADER in
the audio function menu.
Refer to Introduction of DSP adjustments on
the previous page.
# If the balance setting has been previously ad-
justed, BALANCE will be displayed.
2 Press a or b to adjust front/rear speak-
er balance.
FADER:F25 to FADER:R25 is displayed as the
front/rear speaker balance moves from front to
rear.
# FADER:0 is theproper setting when only two
speakers are used.
3 Press c or d to adjust left/right speaker
balance.
BALANCE:L25 to BALANCE:R25 is displayed
as the left/right speaker balance moves from
left to right.
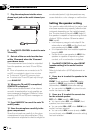
Using the position selector
One way to assure a more natural sound is to
accurately position the stereo image, putting
you right in the center of the sound field. The
position selector function lets you automati-
cally adjust the speaker output levels and in-
serts a delay time to match the number and
position of occupied seats. When used in con-
junction with the SFC, the feature will make
the sound image more natural and offer a pa-
noramic sound that envelops you.
! When you make adjustments to the listen-
ing position, the speaker outputs are auto-
matically set for appropriate levels. You can
tailor the levels more precisely referring to
Adjusting the speaker output levels using a
test tone or Adjusting the speaker output le-
vels.
1 Use MULTI-CONTROL to select POSI in
the audio function menu.
Refer to Introduction of DSP adjustments on
the previous page.
2 Press c/d/a/b to select a listening po-
sition.
Direction Display Position
c F/L Front seatleft
d F/R Front seatright
a FRT Front seats
b ALL All seats
# To cancel the selected listening position,
press the same button again.
Available accessories
En
53
Section
03
Available accessories