


ķ
17
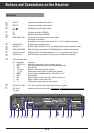
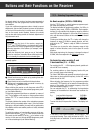
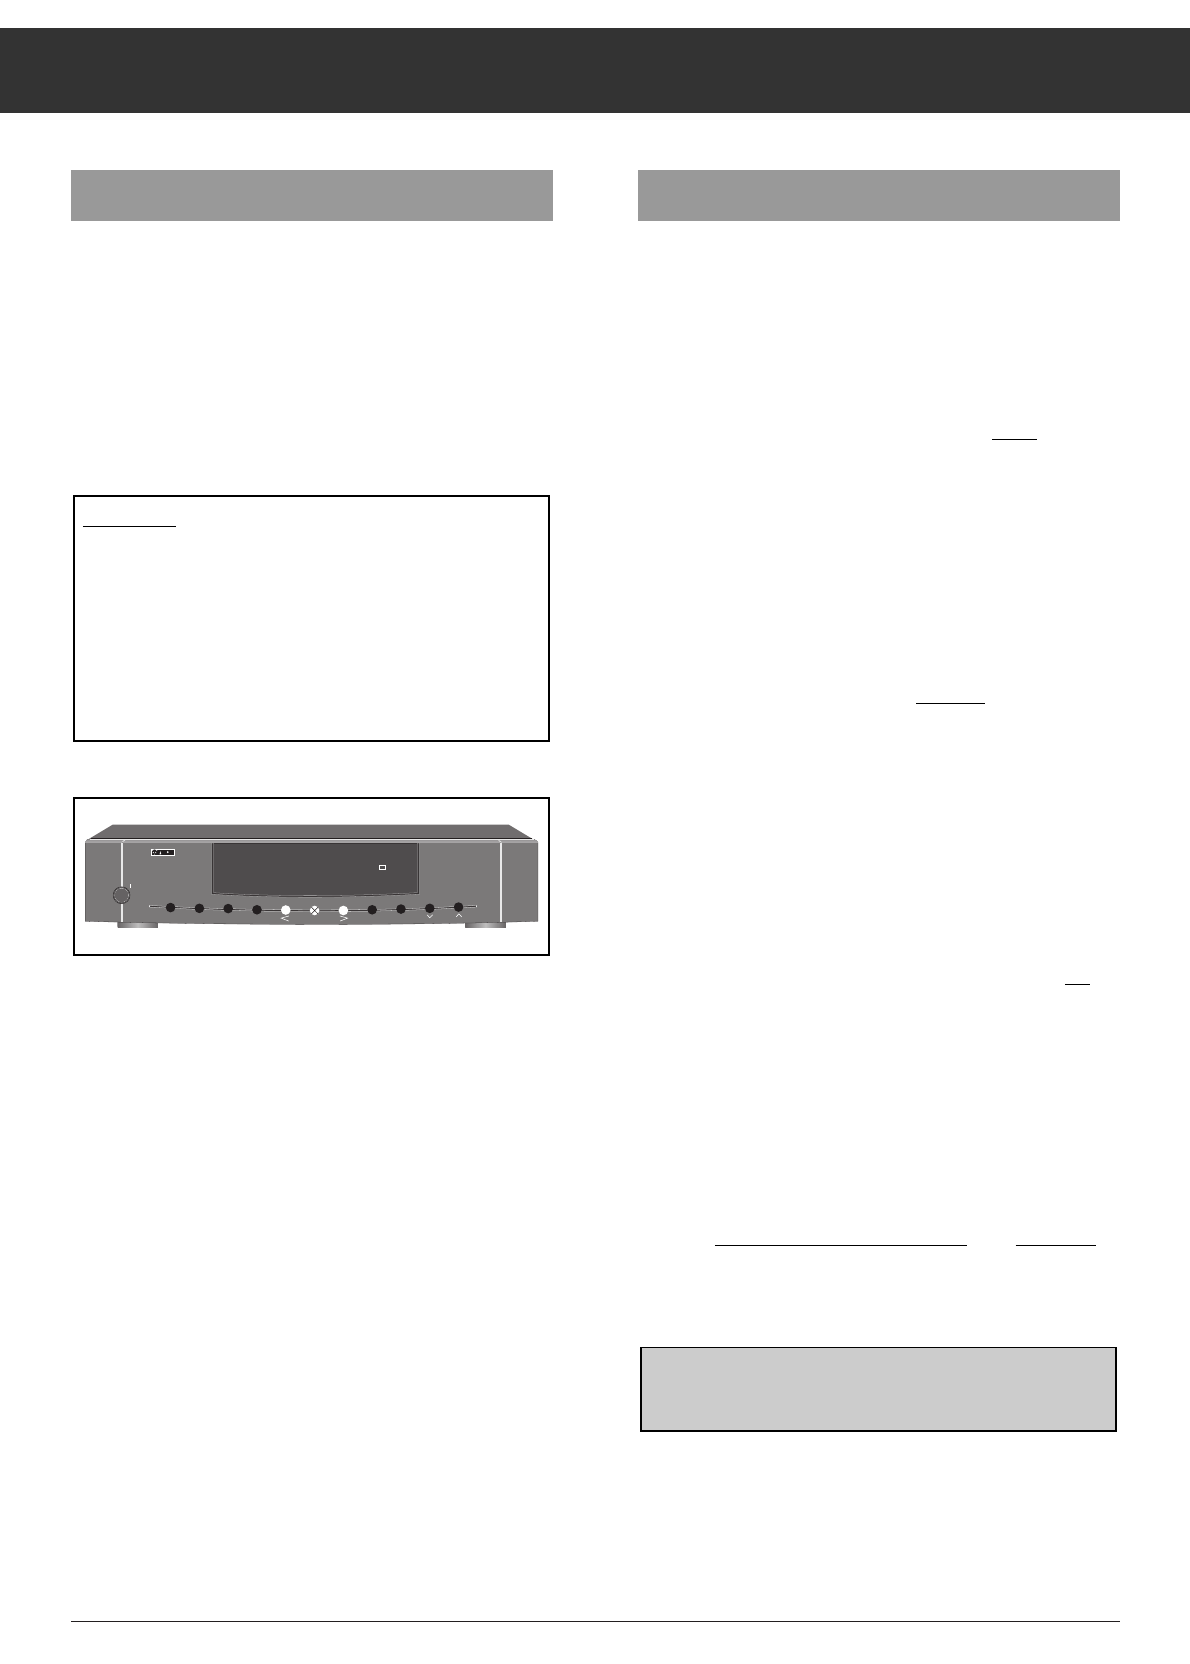
Buttons and their Functions on the Receiver
¢P/F – Selecting Programme/Frequency
Ku-Band reception (10700 to 13000 MHz)
Use the
¢
P/F button to switch between programme posi-
tion mode and frequency entry mode.
The display indicates the programme positions 1 to 199 or, in
frequency entry mode, 10700 to 13000 MHz. Real reception,
however, is only possible in the frequency range for which the
used LNC has been designed. In this mode, direct frequency
entry with the numeric buttons of the remote control handset
is possible.
Pressing and holding down the
¢
>
button will change the
frequency in steps of 10 MHz in upward direction, and hol-
ding down the
¢
<
button in steps of 3MHz in downward
direction.
This allows you to scan the entire frequency range at high
speed in forward direction, and at lower speed in reverse
direction.
With single step tuning, the frequency is changed in steps of
0.5MHz, which corresponds to the finetunin
g function.
Particularities when receiving S- and
C-band satellites (2.5 ... 4 GHz)
For receiving the 2.5 … 4 GHz frequency bands, special aeri-
als and LNC´s are necessary.
For receiving stations on these frequency bands with your
unit, you must observe the following:
The value 10000 MHz must generally be entered in the instal-
lation menu as local oscillator frequency for the LNC, not
the
actual value of the LNC.
When adjusting the frequency for the programme position
concerned (
¢
P/F button), do not enter the transmission fre-
quency of the satellite, but the output frequency of the LNC
(first intermediate frequency = IF 1).
You can calculate the IF 1 by subtracting the transmission
frequency of the satellite from the actual local oscillator fre-
quency.
E.g. Local oscillator frequency: 5100 MHz
– Satellite transmission fr
equency: – 3900 MHz
= Result (IF 1): = 1200 MHz
To enter this value, first press the "0" button. The display indi-
cates:
In this case (S- and C-band reception), the first figure "1" has
no physical meaning. Then, enter the value for the IF 1. For a
three-digit value, an additional "0" must be entered at the first
position.
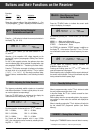
TIMER
opü+
I99 X1____M
z
STEREO
SIGNAL IIIIIIIIIIIII
General
As already stated, the receiver has been preprogrammed at
the factory for the main programmes from the most impor-
tant satellites.
If you wish a different programme order or intend to correct
adjustments, this can easily be done by means of the buttons
on the front of the receiver and, in certain cases, with the but-
tons on the remote control handset. However, this should
only be done after having carried out the basic adjustment of
the polarmount aerial.
Generally applies:
●●
Certain functions can be called up by pressing these but-
tons once or several times.
ǵǵ
Preset functions can be modified with these buttons.
ǵǵ
X
Settings and corrections made are stored in memory by
pressing the
¢
MEMORY button.
When switching the receiver on with the power switch
´R
, it
switches automatically to the last selected programme positi-
on (Last Station Memory).
The desired programme positions are selected by means of
the
¢
<
/
>
buttons on the receiver or the programme select
buttons
]|
or numeric buttons on the remote control
handset.
The display indicates the number of the selected programme
position and the associated station name. If the new station
belongs to a different satellite, the aerial will be positioned to
this satellite and the new satellite position is briefly indicated
in the display.
To switch the receiver on from standby, press one of the pro-
gramme select buttons
]|
or of the numeric buttons on
the remote control handset, or of the
¢
<
/
>
buttons on the
receiver. In this case too, the last selected programme positi-
on will be selected again (Last Station Memory).
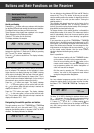
POWER
AUDIO
RADIO
MODE
MEMORY
V/H
P/F
Ǽ
TIMER
STEREO
SIGNAL
IIIIIIIIIII
STR 400 AP
ǵ
199
ADNAP
VIDEO
ʐ
DSF
1
Attention!
The buttons on the front of the receiver, except the
¢
<
/
>
and
¢
RADIO buttons, are electronically locked
to prevent that the receiver programming be changed by
inadvertent operation of the buttons (for example, when
wiping off dust).
To clear the electronic lock, press on any of the locked
buttons for more than 3 seconds. When switching the unit
off or to standby, the electronic lock is activated again.