


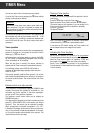

The MODE Menu
ķ
24
MODULAT. – Adjusting the Modulator Channel
The display indicates "
MODULAT.
" .
With the
¢
<
/
>
buttons, it is possible to select an HF chan-
nel between CH25 and CH 60 of the PLL modulator. The fac-
tory-presetting is 36 (CH 36).
The TV receiver needs to be connected via the HF output of
the SAT receiver if it has no EURO-AV socket.
It is also possible to connect an additional TV receiver (e.g.,
in the sleeping room) to this socket. In this case, the TV
receiver can be controlled via an additional infrared receiver
and a 3-pole telephone cable which is connected with the
remote control socket of the SAT receiver (see connection
example on page 4).
ATS – Automatic Tuning System
It is possible to effect an automatic search for the stations (pro-
grammes) of a new satellite and store the desired stations in
memory.
To do this, first manually direct the aerial with the help of the
aerial menu at the "new" satellite (see chapter "Basic Adjustment
of the Polarmount Aerial"). Next, select the ATS menu option
and start the automatic search by pressing the
¢
>
button.
Stations are searched in direction of increasing frequencies.
If a station has been found, this is automatically finetuned.
It is possible to store the found station in memory by pres-
sing the
¢
MEMORY button, or to restart the search with the
¢
>
button. After each storage function, the programme posi-
tion is incremented by one. If the whole frequency range has
been run through, use the
¢
H/V button to select the other
polarity and start the search function again.
Existing station designations will be erased.
The search function is infinite. When the highest frequency
(13000 MHz) has been reached, the search is automatically
restarted at 10700 MHz. The frequency band which can
actually be received depends on the used LNC.
Necessary picture and sound corrections such as, for exam-
ple, sorting, copying, sound carrier and mono/stereo chan-
ges, must be carried out now
, not during the ATS search fun-
ction.
When the search is concluded, it is very easy to determine
the desired programme order with the "SORT" menu option.
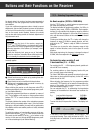
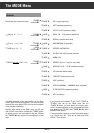
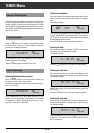
20:15 – Time and Date
The display indicates the time, for example:
TIMER
opü+
I99 X20
:
14XX
STEREO
SIGNAL IIIIIIIIIIIII
If the clock is running, the colon between the hours and
minutes indication is flashing.
With the
¢
>
button, you can switch between time and date
indication.
With the numeric buttons on the remote control handset, it is
possible to set (correct) the time and date (summer time/win-
ter time).
After having entered the last digit, time setting is concluded.
Invalid values (e.g. 31.2.) are ignored. To ensure that ulterior
Timer functions are correctly started, the clock should preci-
sely be set.
CODE – Child Lock
It is possible to protect your receiver against unauthorized
use (child lock).
Enter your 4-digit personal security code, for example, 2537,
with the numeric buttons on the remote control handset.
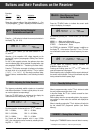
The display indicates:
The child lock is activated by pressing the
O
button.
The display indicates for approx. 3 seconds "
SET
".
Then, the display automatically indicates the current pro-
gramme position number.
Now, when switching off the unit, it will be locked.
When switching the unit on again with the power switch or,
from standby, with the remote control handset, the display
indicates "
CODE
".
This message prompts you to enter your personal security
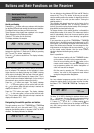
code. When entering the code, this will be hidden:
If the correct code number is entered, the receiver will be
unlocked and switched to the programme position selected
before.
However, the child lock remains active, i.e. the receiver is
locked again when switching it off the next time.
TIMER
opü+
I99 CODE
----
STEREO
SIGNAL IIIIIIIIIIIII
TIMER
opü+
I99 CODE2537
STEREO
SIGNAL IIIIIIIIIIIII