66
Photo mode
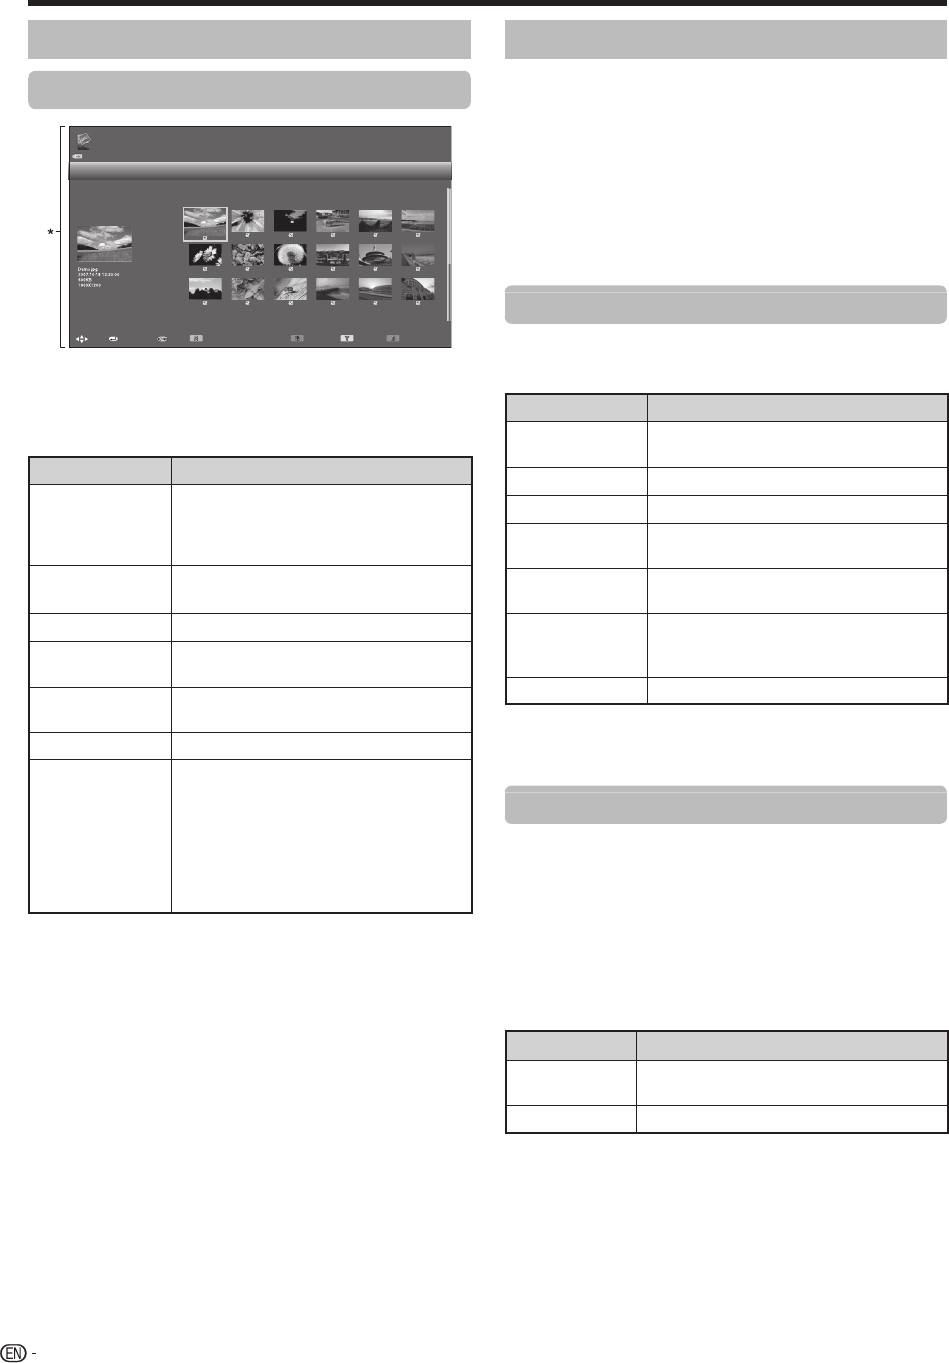
Viewing thumbnails
/
Demo
MultimediaSelect photo
[File name order]
Flash Disk > Demo
Only compatible file formats are displayed.
:Back
:Display photo
:Select
:Select/deselect slide show Image
:To top menu
:Slide show :Multimedia menu
* This screen image is for the Multimedia mode. It may be
slightly different in the Home network mode.
Buttons for thumbnail operations
(When using Multimedia mode)
Buttons Description
?
When selecting a folder icon: Enter this
directory.
When selecting a photo thumbnail:
Enlarge the photo.
a/b/c/d
(Cursor)
Select a desired item.
C
Return to the previous operation.
R button
Select/deselect items
(✓ mark appears on the selected items).
G button
All*: Select BGM for the slide show.
Folder*: Move to the parent folder.
Y button
Start the slide show.
B button
Display “Multimedia menu”.
• 3D display
• Select slide show interval
• Select slide show BGM
• Set all slide show image
• Reset all slide show image
• USB device or SD/SDHC memory
card removal
* The mode selected in “Folder display setting”.
NOTE
• When there are invalid photo files, the g mark will be
displayed for the file.
• The 3D mode icon appears on the thumbnails of 3D images.
If you do not switch to 3D mode for the 3D images, they will
be displayed in 2D.
• You can see the file name, shooting date, file size and pixel
size of the selected photo on the left of the screen (shooting
date is only available in the EXIF file format).
3D mode
You can view photos in 3D mode.
1 Press B to display the “Multimedia menu” screen.
2 Press a/b to select “3D display”, and then press
?.
• See pages 74 to 83 for details on the 3D function.
NOTE
• In 3D mode, you cannot rotate the photos.
• You can select “3D display” from “Multimedia menu” only
when the thumbnails screen for the photo mode in Multimedia
mode is displayed on the screen.
Viewing enlarged photos
Buttons for enlarged photo display operation
(When using Multimedia mode)
Buttons Description
c/d (Cursor)
Go to the previous/next photo in the
same directory.
C
Return to the thumbnail selection screen.
3D
Switch between 2D and 3D modes.
R button
Rotate the photo by 90 degrees to the
left.
G button
Rotate the photo by 90 degrees to the
right.
B button
Display “Multimedia menu”.
• USB device or SD/SDHC memory
card removal
DISPLAY
Reveal the guide display.
NOTE
• Rotating photos only applies to the temporarily selected item
and this setting is not saved.
Selecting the picture size for Photo mode
You can select the picture size in “Photo mode”.
1 Select “Photo mode”.
• Refer to Selecting modes and drives/servers on
page 65.
2 Press WIDE.
• The “Wide mode” menu displays.
3 Press WIDE or a/b to select the desired item.
• As you toggle the options, each is immediately reflected
on the screen. There is no need to press ?.
Item Description
Auto
Keep the original aspect ratio in an
enlarged screen display.
Original
Keeps the original aspect ratio and size.
NOTE
• For “Original” item, if the photo size is larger than 3840 x
2160 vertically or horizontally, the original aspect ratio is kept
in full screen display.
Other useful features
LC90LE760X_EN_book.indb 66LC90LE760X_EN_book.indb 66 4/4/2014 3:10:10 PM4/4/2014 3:10:10 PM


