


9
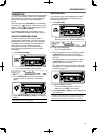
GETTING ACQUAINTED 2
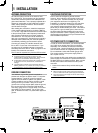
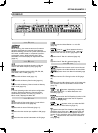
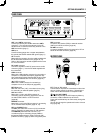
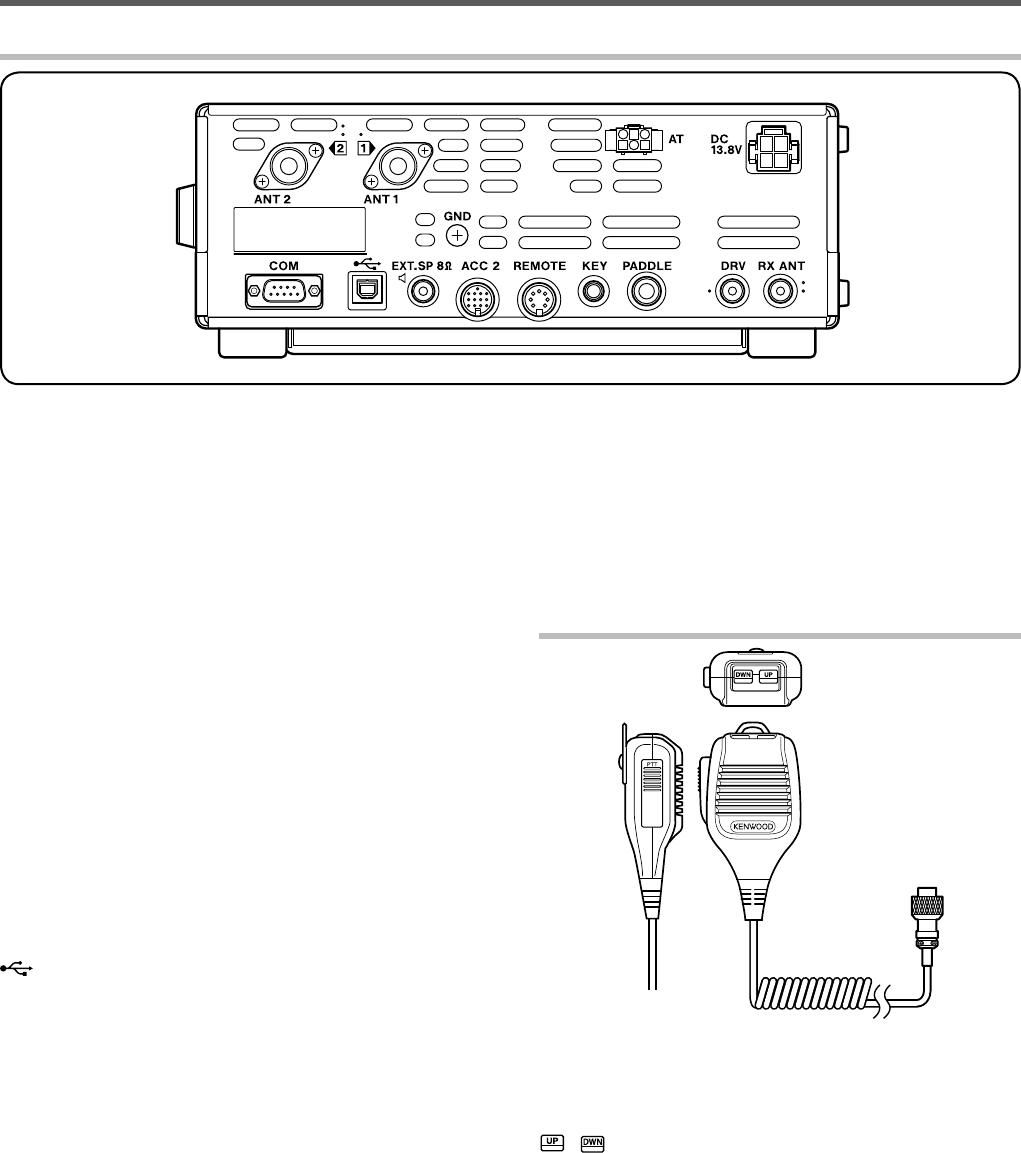
ANT 1 and ANT 2 connectors
Connect your primary HF/ 50 MHz antenna to ANT 1
connector. If you are using 2 antennas for the HF/
50 MHz band, connect the secondary antenna to the
ANT 2 connector {page 1}.
GND post
Connect a heavy gauge wire or copper strap between
the ground post and the nearest earth ground {page 1}.
AT connector
Mates with the connector from the cable supplied with
the AT-300 external antenna tuner {pages 70, 74}.
Refer to the instruction manual supplied with the tuner
for more information.
DC 13.8 V connector
Connect a regulated 13.8 V DC power source to this
connector {page 1}. Use the DC cable supplied with
the transceiver.
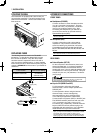
COM connector
Mates with a DB-9 female connector for connecting a
computer or compatible transceiver {pages 60, 69}.
Also used with the Quick Data Transfer function {page
59} and DX PacketCluster Tune function {page 67}.
(USB) connector
Mates with a USB connector for connecting a
computer via one of its USB ports {pages 60}.
EXT.SP 8 jack
Mate with a 3.5 mm (1/8"), 2-conductor (mono) plug
for connecting an external speaker {page 2}.
ACC 2 connector
Mates with a 13-pin male DIN connector for
connecting various accessory equipment, such as
an external TNC/ MCP or a RTTY terminal
{page 69}.
REMOTE connector
Mates with a 7-pin male DIN connector for connecting
an HF/ 50 MHz linear amplifi er {page 70, 73}.
KEY and PADDLE jacks
The KEY jack mates with a 3.5 mm (1/8") 2-conductor
plug for connecting an external key for CW operation.
The PADDLE jack mates with a 6.3 mm (1/4")
3-conductor plug for connecting a keyer paddle to
the internal electronic keyer. Refer to “Keys for CW
(PADDLE and KEY)” {page 2} before using these jacks.
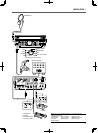
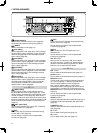
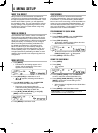
REAR PANEL
DRV connector
Connect a drive device (DRO) or external receiver
(ANT) to this RCA connector {page 52}.
RX ANT connector
Connect a separate receive-only antenna for HF low
bands to this RCA connector {page 52}.
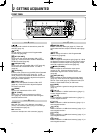
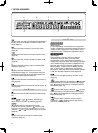
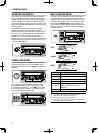
MICROPHONE
PTT (Push-to-Talk) switch
The transceiver is placed in Transmission mode when
this non-locking switch is held down. Releasing the
switch returns the transceiver to Reception mode.
/ Mic [UP]/ [DWN]
Use these keys to step the VFO frequency, Memory
Channels, or Menu selections up and down.
Press and hold these keys to continuously change the
settings.
You can also change the operational function of these
keys {page 56}