


6 – Basic Operations–Recording the first tracks
TASCAM DA-98HR 33
NOTE
If you do press the
FORMAT/Fs
key twice so that the indi-
cator lights steadily and you then change your mind about
formatting the tape, you can use the
STOP
key
V
, the
CLEAR
key
G
or the
ESCAPE
key
a
to cancel the
operation.
4 Use the HR key 6 to determine whether
recording will take place in HR (24-bit) or
standard (16-bit) resolution. When the indica-
tor is lit, HR mode is selected.
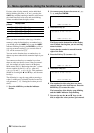
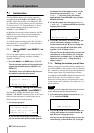
5 Select the base sampling frequency either
44.1 kHz or 48 kHz) by pressing the
FORMAT/
Fs
key.
The sampling frequency that you select is used
as the base frequency of all other frequencies.
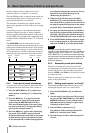
The display shows something similar to the
following:
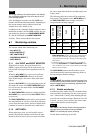
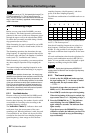
6 Use the § and ¶ keys to change the available
track combination.
If HR mode is not selected, it is impossible to
select any track combination other than the
eight base-frequency track combination. If HR
mode is not selected (the
HR indicator is not lit)
and a combination including dual or quad-fre-
quency tracks is selected, the display shows
Not HR Mode.
NOTE
If a digital signal is received at either TDIF-1 input
u
or
the AES/EBU input
p
and has been selected as a record-
ing source, the DA-98HR’s base recording and playback
sampling frequency is automatically determined by the
sampling frequency of the input signal and you cannot
change it.
7 To start formatting the tape, hold down the
RECORD key X and press the PLAY key W.
NOTE
The tape counter may show a negative ABS time for a
short while at the start of the formatting process. While it is
displaying a negative value, no audio recording can take
place.
8 The tape will format to the end, and then
rewind automatically, stopping at the 00 00
00 00
position.
You are now able to use the tape for recording.
It is possible to format tapes on a number of DTRS
units simultaneously. For details, see 8.5.1, “Syn-
chronized formatting”.
6.2.3 Aborting the format process
To abort the process before formatting actually takes
place (i.e. you have pressed the
FORMAT/Fs key
twice in error), press the
STOP key V. The FOR-
MAT
indicator will go out.
As explained earlier, the only transport operation you
can perform once formatting has started is to stop the
tape.
However, we do not recommend interrupting the for-
matting process, but strongly suggest that you let the
tape run to the end. If you interrupt the formatting (or
the formatting is interrupted by a power cut or events
beyond your control), rewind the tape and start the
format from the beginning of the tape again.
6.2.4 Recording while formatting
If you have armed any tracks (you have pressed the
appropriate
REC FUNCTION key(s) e and the indi-
cator is flashing), any audio signal routed to that
track will be recorded while formatting is in
progress.
NOTE
S
If you have recorded and formatted part of a tape, and you
will continue formatting and recording on the rest of the
tape (“assembly”), you should rewind to a pre-formatted,
blank section of the tape and resume formatting and
recording from there.
Recording and formatting will continue at the sampling fre-
quency used on the first part of the tape.
Avoid re-starting recording and formatting from an unfor-
matted section of the tape.
6.3 Recording the first tracks
There are a number of different ways of recording the
first tracks. However, all follow the same basic
principles.
NOTE
S
When using a newly-formatted tape, we suggest that you
record a blank “leader” about 30 seconds long, starting
from the beginning of the tape, to avoid dropout. Leave a
similar recorded blank “trailer” at the end of the recording.
You can use the Rec Mute function as a convenient way of
recording silence ( see 7.11, “REC MUTE (recording
silence)”).
Format
Select Track fs
176k 88k 44k
008