


7 – Advanced operations–REC MUTE (recording silence)
TASCAM DA-98HR 47
length is set to 20 or 24 bits and recording at 16 bits
(non-HR). Though you will lose a little in the signal-
to-noise ratio, total harmonic distortion figures will
be improved.
NOTE
If you are dubbing tracks from a DA-88, this value must
always be set to 16 bits.
7.10.3 Setting the high-frequency AES/
EBU I/O transfer mode
There are two ways in which high-frequency (i.e. not
at the base sampling frequency) AES/EBU data can
be input and output from the DA-98HR.
NOTE
This only applies when four dual-frequency tracks have
been selected (see 6.2.1, “Available tracks”). In all other
cases, the output is as described in 3.1.3, “Digital audio
connections (using AES/EBU)”.
The first choice is dual line. This means
that each dual-frequency digital audio signal is car-
ried in parallel along two channels (this is the way on
which the TDIF connector always transmits and
receives high-frequency digital audio data.
The other choice is
high speed. This means
that one AES/EBU dual-sampling frequency signal is
carried at high speed along one AES/EBU channel.
It is not possible to have some audio channels trans-
mitted using one method, and others using another—
all channels must be transmitted using the same
method. See the table in 3.1.3, “Digital audio con-
nections (using AES/EBU)” for further details.
To select the method:
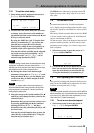
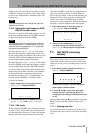
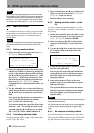
1 Enter menu group A, move the cursor to
AESx2Io, and press ENTER:
2 Use the § and ¶ keys to change between
dual line and high speed.
7.10.4 Cbit mode
When receiving AES/EBU data, the header informa-
tion (the “Cbits”) in the audio data contain informa-
tion about the audio format, etc. If these bits indicate
that the audio data being received does not match
what the DA-98HR is expecting, an appropriate mes-
sage will normally be shown on screen. However,
this can be over-ridden, so that no such messages are
displayed. If this is done, typically no damage will
result to the system, but audible noise and pitch
changes, etc. may be noticeable. Without the warning
messages, it may be difficult to track these down.
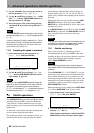
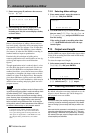
1 Enter menu group A, move the cursor to
CbitMode and press ENTER:
2 There are two settings here:
Normal
(warning messages are displayed) and No
Warning
(the messages are suppressed).
7.11 REC MUTE (recording
silence)
There may be times when you wish to prevent any
signal from reaching an armed track (in other words,
when you record, you are recording silence onto the
track).
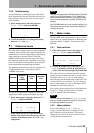
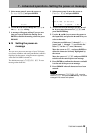
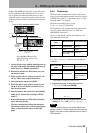
1 Enter menu group 1, move the cursor to
Rec
Mute
and press ENTER:
In this screen, tracks 7 and 8 are muted (no
input signal is routed to them).
2 Use the Ó and Á cursor keys to navigate
between tracks. Use the § and ¶ keys to
switch the track muting of individual tracks on
or off.
Pressing and holding the § key and then pressing the
¶ key will reset the REC MUTE settings of all
tracks.
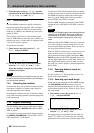
7.11.1 Viewing user bits
If user bits have been recorded as part of the incom-
ing digital data, these can be viewed in the following
way:
AES x2 I/o Mode
dual line
Receive Cbit Mode
Normal
Rec Mute
On » »
Off
»»»»»»
Trk 12345678