


16
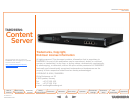
TANDBERG CONTENT SERVER
USER GUIDE
Table of
Contents
What’s New in
this Version?
Trademark/
Licenses
Safety/
Environmental
Introduction Installation Quick Setup Operation
Administrator
Settings
Conference
Setup
View
Conferences
Appendices
D 13898.04
DECEMBER 2006
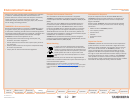
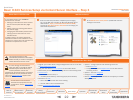
What’s in the Box?
To avoid damage to the unit during transportation,
the Content Server is delivered in a special
shipping box, which should contain the following
components:
CD with User Guide and other documentation
Rack-ears, screws and screwdriver
Cables
Power cable
Ethernet cable
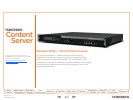
TANDBERG Content Server.
Kindly report any discrepancies to your
TANDBERG Representative immediately.
•
•
•
•
•
•
Installation Site Preparations
Make sure that the Content Server is
accessible and that all cables can be
easily connected
For ventilation: Leave a space of at least
10cm (4 inches) behind the Content
Server’s rear panel and 10cm (4 inches) in
front of the front panel
The room in which you install the
Content Server should have an ambient
temperature between 0ºC and 35ºC (32ºF
and 95ºF) and between 10% and 90% non-
condensing relative humidity
Do not place heavy objects directly on top
of the Content Server
Do not place hot objects directly on top, or
directly beneath the Content Server
Use a grounded AC power outlet for the
Content Server.
•
•
•
•
•
•
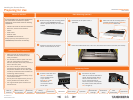
Rack Mounting (optional)
Before starting the rack mounting please
make sure the TANDBERG Content
Server is placed securely on a hard flat
surface.
Disconnect the AC power cable, if
applicable.
Make sure that the mounting space is
prepared according to the Installation
Site Preparations below left.
Attach the brackets to the Content
Server on both sides of the unit.
Insert the Content Server into a 19” rack, and secure with screws in the front (four screws).
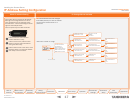
Connect a LAN cable from
the LAN 1 connector
on the Content Server
to your network.
The LAN 2, 3 and 4
connectors are
not used and should
be left open.
Connecting Cables
Preparing for Use
10 cm
10 cm
Connect the AC power
cable to an electrical distribution
socket. Press the power switch
button at the back side to 1 to
turn on the Content Server.
On the front panel of the system
the power indicator LED, marked
Pwr, will light up.
Installing the Content Server