


32
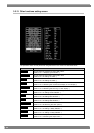
3.4.11 Adjusting the user marker display position
1. Press the MENU switch.
2. Turn the adjustment dial to select MARKER SETTING , and press the ENT
switch.
3. Turn the adjustment dial to select User H or User V , and press the ENT
switch.
4. Turn the adjustment dial to adjust the user marker display position, and press
the ENT switch to enter the position.
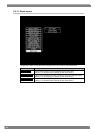
3.4.12 Setting the marker thickness
1. Press the MENU switch.
2. Turn the adjustment dial to select MARKER SETTING , and press the ENT
switch.
3. Turn the adjustment dial to select Thickness , and press the ENT switch.
4. Turn the adjustment dial to select the marker thickness, and press the ENT
switch to enter the thickness.
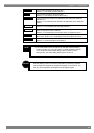
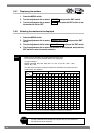
When 16:9, blanking or under scan is selected as the aspect ratio setting,
the marker display position is adjusted as a percentage of the image area;
when 4:3, Actual Size or Twice Size is selected, it is adjusted as a
percentage of the LCD screen.
NOTE
To display the user marker, MARKER must be set to ON, and User must be
selected using Select Marker .
CAUTION
The line width of the frame marker and grid marker remain unchanged.
NOTE