


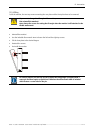


12. Accessories
12-24
_________________________________________________________
Barco - LC series - R5976934 - user's manual - Revision 08 - April 2008
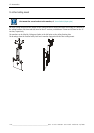
12.7.2 Installation
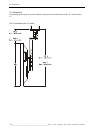
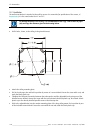
The wall mount bracket is attached to the wall by means of 4 screws M8 (for specification of the screws, cf.
Required tools.). It is the same bracket for 42" and 47".
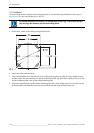
For drilling the holes in the ceiling, it is recommended to use a jig – take a sheet of paper
(A4) and copy the distances given in the drawing below.
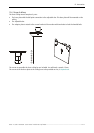
• Drill 4 holes, 10mm, to the ceiling in the given distances!
• Attach the ceiling mounting plate.
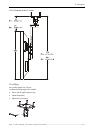
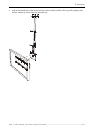
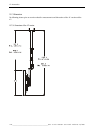
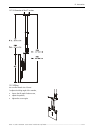
• Slid in the telescope bar and lock its position by means of a screw M10x60. Secure the screw with a nut, and
apply the black plastic cap.
• Complete the ball point connection between the telescope bar and the adjustable bar by using one of the
included screws M10x60. Secure the screw with the nut and attach the black plastic cap. Also attach a black
plastic cap to the already installed parallel screw on the telescope bar.
• Slide in the adjustable bar into the monitor mounting plate of the long ceiling mount. Fix its position by one
of the included screws M10x60. Secure the screw with the nut and attach the black plastic cap.