— When delays occur for low sounds due
to the influence of the LPF on active
subwoofers or external amps.
! Auto TA and EQ changes the audio settings
as below:
— The balance settings return to the center
position. (Refer to page 25.)
— The graphic equalizer curve switches to
FLAT. (Refer to page 29.)
! If you carry out auto TA and EQ when a pre-
vious setting of this already exists, the set-
ting will be replaced.
! When connecting tweeters, please confirm
the tweeter’s usable frequency range.
When you set the cut-off frequency, set
higher than the lowest usable frequency of
the tweeter.
! Auto TA uses higher range than 10 kHz for
measurement. Therefore, using the tweeter
that cannot reproduce 10 kHz frequency
range may damage the tweeter. When Auto
TA&EQ is operated, be sure to set the ap-
propriate cut-off frequency. Also, use the
tweeter that can reproduce 10 kHz at the
lowest usable frequency.
! Speakers used with this system need to be
activated in the initial setting menu. Refer
to Setting the speakers on page 35.
! To perform auto-time alignment and auto-
equalizing, be sure to connect speakers to
mid range output.
Carrying out auto TA and EQ
1 Stop the car in a place that is as quiet
as possible, close all doors, windows and
the sun roof, and then turn the engine off.
# If the engine is left running, engine noisemay
prevent correct auto TA and EQ.
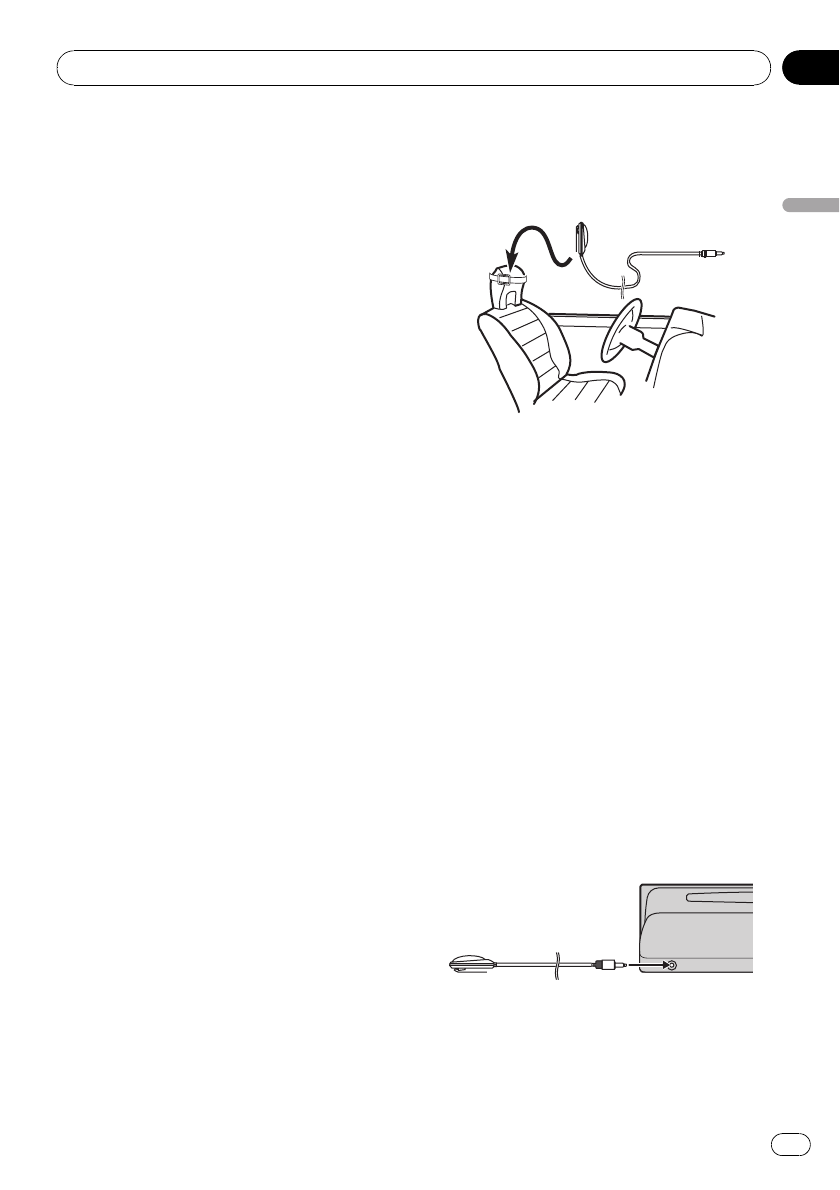
2 Fix the supplied microphone in the cen-
ter of the headrest of the driver’s seat, fa-
cing forward, using the belt (sold
separately).
# The auto TA and EQ may differ depending on
where you place the microphone. If desired,place
the microphone on the front passenger seat to
carry out auto TA and EQ.
3 Turn the ignition switch to ON or ACC.
# If the car’s air conditioner or heater is turned
on, turn it off. Noise fromthe fan in the air condi-
tioner or heater may prevent correct auto TA and
EQ.
# Press SRC/Off to turnthe source on if this
unit is turnedoff.
4 Press SRC/Off and hold until the unit
turns off.
5 Press and hold EQ to enter the auto TA
and EQ menu.
The front panel opens automatically.
6 Plug the microphone into the micro-
phone input jack on this unit.
7 Turn MULTI-CONTROL to select
Select position in the auto TA and EQ
menu.
Audio Adjustments
En
33
Section
03
Audio Adjustments