Appendix C Lexicon
C-10
Macro Power ON Setup:
Any of the touch screen menu options can be setup as Macro buttons.
Follow the instructions below to setup a macro button that will power
ON several components at once.
1. On the remote control, press and hold the MAIN and ENT (Enter)
buttons at the same time. After about 3 seconds, “SETUP” is
displayed in the Menu name area at the top of the LCD touch
screen. This is the Setup mode of the remote control.
NOTE: You now have 30 seconds to perform the next step while the
remote is in the Setup mode. If a button is not pressed within 30
seconds, the SETUP menu name will revert to MAIN, indicating that
the remote control is no longer in Setup mode. If this occurs, you will
need to repeat this step to re-enter the Setup mode.
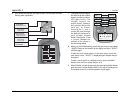
2. Touch the MACRO option to setup a macro to power ON several
components at the same time. The menu name changes to
“MACRO” and the bottom of the screen flashes “SELECT”.
3. Touch the ON option. The menu name changes to “ON” and the
bottom of the touch screen flashes “STEP 0”, indicating that no
macro steps have been entered yet.
4. Touch a component option that you want the macro to turn ON.
Use the menu page arrows to navigate to the other menu pages, if
required. The menu name changes to the name of the component
option that you touched and the bottom of the screen now flashes
“STEP 1”.
5. Press the ON button again to confirm the action. The Step
Indicator now displays “STEP 2”.
Note: The Step Indicator is a macro step counter. Every button that is
pressed will increase the Step Indicator by one. But each macro can
store up to 190 steps.
6. Press the MAIN button to return to the Main component listing.
7. Repeat Steps 4 through 6 until all of the components that you
want to power ON at once have been added to the macro.
Note: If desired, you can also program delays into the macro between
the commands, by pressing the PAUSE (
||) button. Each press adds
half a second to the delay.
8. When all of the components have been added to the macro, press
the LIGHT button. The menu name changes to “MACRO” as a
new screen is displayed with the options: SAVE, UNDO, and EXIT.
9. To save the macro you just entered, touch the SAVE option. The
UNDO option allows you to erase the last step. The EXIT option
erases all steps for the macro.
10. When finished, exit the Setup mode by pressing the MAIN button
until the touch screen displays MAIN in the menu heading area.
The remote control is in normal operation mode again.
Note: There is no touch screen menu listing for the macro you just
saved. However, when you press the ON button on the remote for one
of the included components, MACRO is displayed in the bottom of the
touch screen area.
Macro Power OFF Setup:
To create a macro which will turn OFF several components at the same
time, just follow the same steps as listed above, but press the OFF
button instead of the ON button.
Macro Using Component Button Setup:
To setup a macro to use a component, in Step 2 of the procedure
above, after pressing MACRO, press the page button twice. The
menu name changes to MAIN. Touch the component option that you
want to set as the macro button. You can navigate to page 2 if
necessary. Now continue in the procedure to Step 3 and follow the rest
of the procedure to completion.
Setting a “Press & Hold” Macro:
Another option for the component button macros is to only send the
macro if the component button is held down. The advantage of this
option is that a normal press of the component button will simply


