Black plate (29,1)
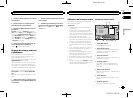
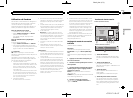
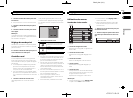
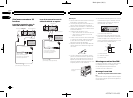
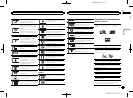
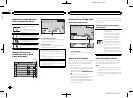
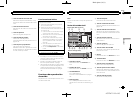
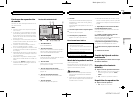
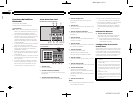
Using fader/balan ce adjustment
Fader/Balance displays whenRear Speaker is
set to Fullon the System Menu.
You can change thefader/balance setting to pro-
vide an ideallistening environment for all of the
occupied seats.
1 Press the homebutton to switch tothe
home display.
2 Touchthe audio function key toopen the
audio menu.
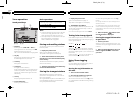
3 TouchFader/Balance on the audio func-
tion menu.
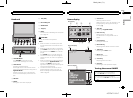
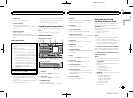
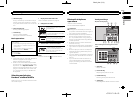
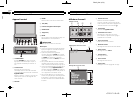
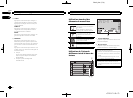
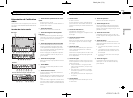
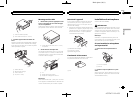
4 Touch
or to adjust the front/rear
speaker balance.
Range: F 15L/R 0 to R 15L/R 0
# SelectF/R 0 L/R 0when onlyusing twospeak-
ers.
5 Touch or to adjust the left/right
speaker balance.
Range: F/R 0L 15 to F/R 0R 15
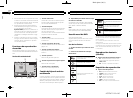
Note
You can also setthe fader/balance by dragging
the dot onthe displayed table.
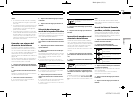
Using balance adjustment
Balance displays whenRear Speaker is setto
Subwoofer on theSystem Menu. This setting
will allow youto adjust the balance between
right/left sound output.
1 Press the homebutton to switch tothe
home display.
2 Touchthe audio function key toopen the
audio menu.
3 TouchBalance on the audio function
menu.
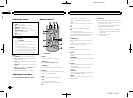
4 Touch
or to adjust the left/right
speaker balance.
Range: L15to R15
Note
You can also setthe balance by dragging thedot
on the displayedtable.
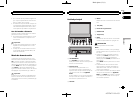
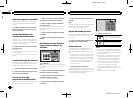
Using the equalizer
You can adjust theequalization to match the
car’s interior acoustic characteristicsas de-
sired.
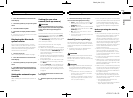
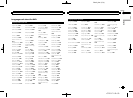
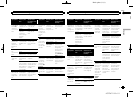
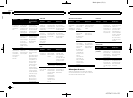
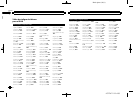
Recalling equalizer curves
There are sevenstored equalizer curves which
you can easilyrecall at any time. Hereis a list of
the equalizer curves.
Display Equalizercurve
S.Bass Super bass
Powerful Powerful
Natural Natural
Vocal Vocal
Flat Flat
Custom1 Custom 1
Custom2 Custom 2
! Theequalizer curves for Custom1and
Custom2 can beadjusted.
! You cannot select Custom1 andCustom2
when using theauto-equalizer.
! WhenFlat,no changes are made tothe
sound. You can checkthe effects of the
equalizer curves by switching alternatively
between Flat andanother equalizer curve.
1 Press the homebutton to switch tothe
home display.
2 Touchthe audio function key toopen the
audio menu.
3 TouchGraphic EQ on the audiofunction
menu.
# Youcannot select oradjust theequalizer curves
of Custom1and Custom2when usingthe auto-
equalizer.
4 Touchthe desired setting.
S.Bass—Powerful—Natural—Vocal—Flat—
Custom1—Custom2
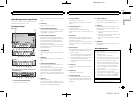
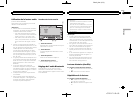
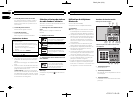
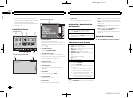
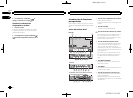
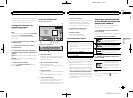
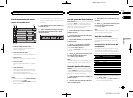
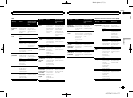
Adjusting the 8-band graphic
equalizer
You can adjust thelevel of each band forthe
equalizer curves.
! Aseparate Custom1curve can be created
for each source.If you make adjustments
when a curve other thanCustom2 is se-
lected, the equalizercurve settings will be
stored in Custom1.
! ACustom2 curve that iscommon for all
sources can becreated. If you make adjust-
ments when theCustom2 cur ve is selected,
the Custom2 curve will beupdated.
1 Press the homebutton to switch tothe
home display.
2 Touchthe audio function key toopen the
audio menu.
3 TouchGraphic EQ on the audiofunction
menu.
4 Touchthe desired setting.
S.Bass—Powerful—Natural—Vocal—Flat—
Custom1—Custom2
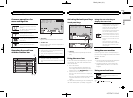
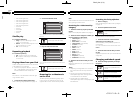
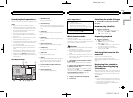
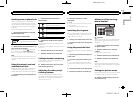
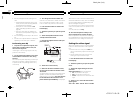
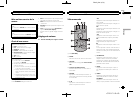
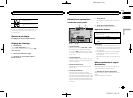
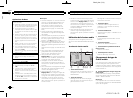
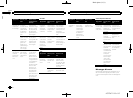
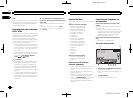
5 Touchthe table to adjust thelevel of the
equalizer band.
Range: +12dB to–12dB
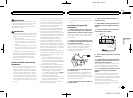
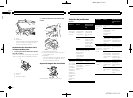
Using the auto-equalizer
The auto-equalizer isan equalizer curve created
by auto EQ(refer to Auto EQ(auto-equalizing) on
page 35).
You can turn theauto-equalizer on or off.
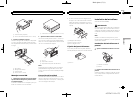
If you connect anoptional microphone to this
unit, you canuse this function.
1 Press the homebutton to switch tothe
home display.
2 Touchthe audio function key toopen the
audio menu.
3 TouchAuto EQ to turn the auto-equalizer
on or off.
# Youcannot use thisfunction ifauto EQhas not
been carriedout.
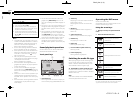
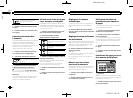
Using sonic center control
Sound that issuited for the listening position
can easily becreated with this function.
1 Press the homebutton to switch tothe
home display.
2 Touchthe audio function key toopen the
audio menu.
3 TouchSonic Center Control onthe audio
function menu.
4 Touch
or to select a listening position.
Range: Left 7to Right 7
English
Audio adjustments
29
Section
Audio adjustments
En
16
<CRD4711-B>29