


3. SIGNALS AND WIRING
3 - 35
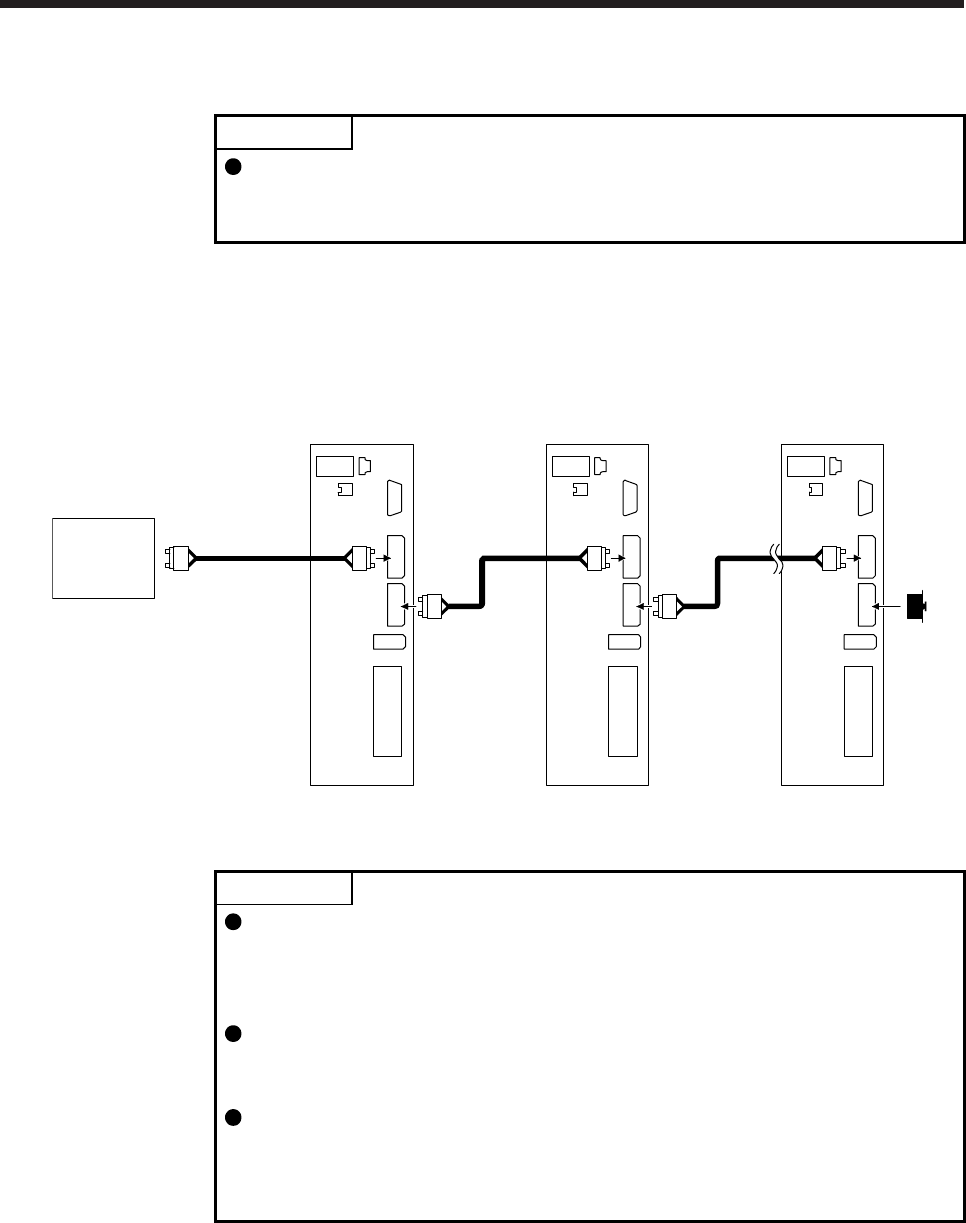
3.9 SSCNET III cable connection
POINT
Do not look directly at the light generated from the CN1A/CN1B connector of the
servo amplifier or the end of the SSCNET III cable. The light can be a discomfort
when it enters the eye.
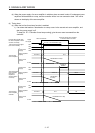
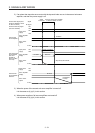
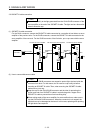
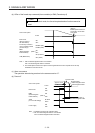
(1) SSCNET III cable connection
For the CN1A connector, connect the SSCNET III cable connected to a controller in host side or a servo
amplifier of the previous axis. For the CN1B connector, connect the SSCNET III cable connected to the
servo amplifier of the next axis. For the CN1B connector of the final axis, put a cap came with the servo
amplifier.
The last axis servo amplifie
r
CN1B
CN1A
Cap
The second axis servo amplifie
r
CN1B
CN1A
SSCNET III cable
Controller
The first axis servo amplifie
r
CN1B
CN1A
SSCNET III
cable
SSCNET III
cable
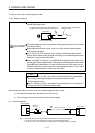
(2) How to connect/disconnect cable
POINT
The CN1A and CN1B connectors are capped to protect light devices inside the
connector from dust. For this reason, do not remove a cap until just before
mounting an SSCNET III cable. Then, when removing the SSCNET III cable,
make sure to put a cap.
Keep the cap for the CN1A/CN1B connector and the tube for protecting the
optical cord end of an SSCNET III cable in a plastic bag with a zipper of the
SSCNET III cable to prevent them from becoming dirty.
When asking repair of the servo amplifier for some malfunctions, make sure to
cap the CN1A and CN1B connectors. When the connector is not capped, the
light device may be damaged at the transit. In this case, replacing and repairing
the light device are required.