


32 DL-V3 User Manual Rev 3
Chapter 2 Installation and Setup
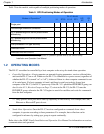
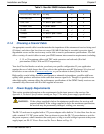
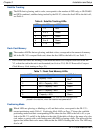
If a different supply is desired, the table below provides the input range and type of connector required
to mate with the enclosure’s power connector. The supply should be capable of 5 W.
Table 4: Enclosure Power Requirements
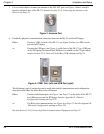
2.1.6 Mounting Bracket
A mounting kit is provided along with the DL-V3 to facilitate mounting the receiver to a surface.
The mounting kits are not designed for use in high-dynamics/vibration environments. Contact
NovAtel if your application needs the DL-V3 to be mounted in this type of environment.
To install the mounting bracket provided with the DL-V3, refer to the instructions provided with the
mounting kit.
2.1.7 Mounting the GNSS Antenna
The DL-V3 has been designed to operate with any of the NovAtel single-frequency or dual-frequency
GNSS antenna models. See Section 2.1.3, Selecting a GNSS Antenna on Page 30 for more
information.
When installing the antenna system:
• Choose an antenna location that has a clear view of the sky so that each satellite
above the horizon can be tracked without obstruction. (Refer to the Multipath in the
GNSS Reference Book).
• Mount the antenna on a secure, stable structure capable of safe operation in the
specific environment.
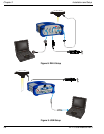
2.1.8 Connecting the Antenna to the Receiver
Connect the antenna to the receiver using high-quality coaxial cable, as discussed in Section 2.1.4 on
Page 31.
The DL-V3 provides a TNC female connector, see Figure 3 on Page 26, which can be connected to
the antenna directly with any of NovAtel’s coaxial cables.
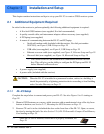
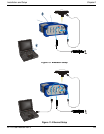
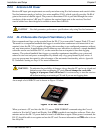
2.1.9 Applying Power to the Receiver
Connect the power supply to the power port. For the DL-V3 you can choose to press its power button
or wait for the power sequence, see DL-V3 Power Down and the Power Button starting on Page 33.
See also Table 4, Enclosure Power Requirements on Page 32.
Enclosure Power Cable Connector Required Power Input Range
DL-V3
4-pin LEMO socket connector
a
labelled PWR
a. See Appendix F, Replacement Parts on Page 200 for connector part numbers.
+9 to +28 V DC